
Understanding the Benefits: Why Maintaining Active USB Debugging Is Essential for Android Users

Understanding the Benefits: Why Maintaining Active USB Debugging Is Essential for Android Users
Key Takeaways
- USB debugging in Android isn’t just for developers - it can be used to recover data and control your phone from a computer.
- Remember to keep USB debugging enabled to access files or control your phone even if the screen is broken.
- Be cautious - enabling USB debugging can allow unwanted access to your data, but Android’s security can prevent this.
You may think that Android’s USB debugging feature, hidden within the developer options, is only for, well, developers. But it can be very useful for just about anyone and could very well save your back someday. To do that, you’ll need to have enabled the feature beforehand.
USB Debugging Can Help Recover Data
On-device developer options exist to help app developers debug (find and fix technical issues) and test apps. Typically, developers code apps in Android Studio on a PC. Enabling USB debugging allows them to send data and commands between their computer and their phone.
But debugging isn’t all. We can use the same feature to access a phone’s files and control them from our computer. The cool part? It works even if the device display or touch screen is broken. As long as the phone is turned on, you can interact with it. The only requirement is that USB debugging has to be enabled already since you can’t do it after the fact on a device with a broken screen.
If you have it enabled, you can simply plug your phone into a pre-authorized computer via USB cable. Then you just have to install Android Debug Bridge (ADB) tools on the computer, and you get full access to your phone—messages, photos, contacts, essentially everything.
Leaving USB debugging enabled comes with a serious caveat. With USB debugging on, anyone who gains physical access can read your data, modify things, or install malicious apps. Even the screen lock won’t protect you. Thankfully, Android’s security stops unwanted access like that. You have to grant permission on your phone to each computer to establish a connection manually. That’s where you can pre-authorize a computer for future use.
How to Enable USB Debugging
Enabling USB Debugging is simple enough. Just go to Settings > About Phone > Build Number. Tap “Build Number” seven times to enable Developer Options.

Then open Developer Options > USB Debugging. Enable the toggle and confirm.

These settings and menus vary slightly between Android manufacturers. If you can’t find these menus, we have a detailed guide on how to enable Developer Options and USB Debugging .
How to Recover Data Using ADB
Once you have enabled “USB Debugging,” we need to set up a recovery point (to use in case your phone malfunctions or breaks).
Everything You Need
To create a “recovery point,” you need:
- ADB tools
- USB Cable
- Scrcpy
You can grab ADB Tools from the official website and Scrcpy from its GitHub repo. ADB tools let you interact with the phone through the command line. We’ll pull files off the phone using ADB. Scrcpy is an awesome tool for mirroring and controlling your phone using your computer’s mouse.
Installing ADB
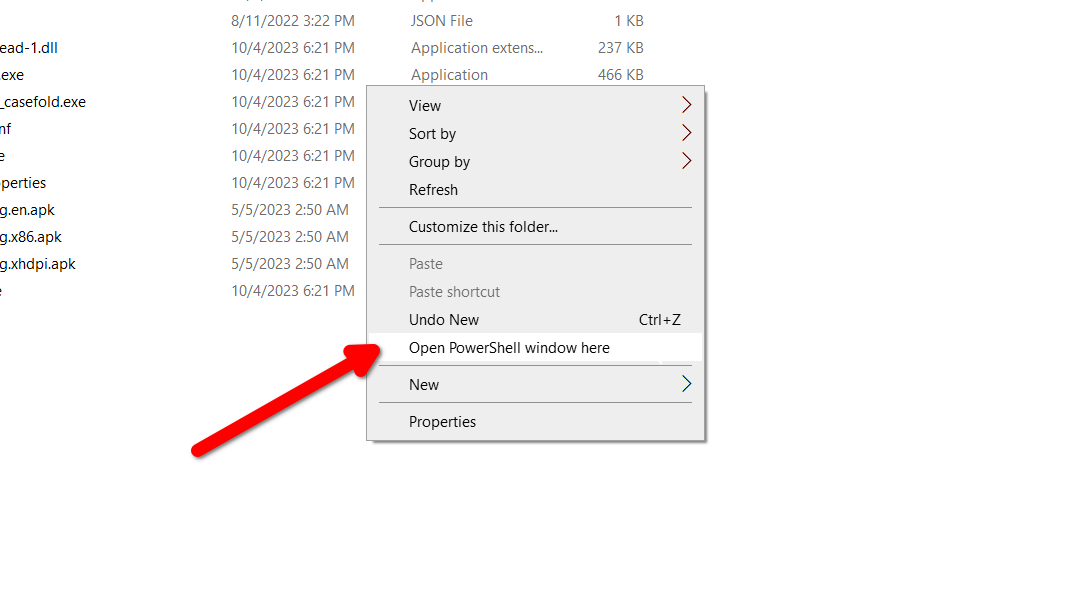
ADB is officially bundled in “Platform Tools.” Extract the Platform Tools archive (that you just downloaded) anywhere on your computer. Open the extracted folder. Hold down shift and right-click anywhere on the blank space. Click “Open PowerShell window here” and wait for the terminal to open.
Connect your phone to the computer using a USB cable (make sure “USB Debugging” is still enabled). A small pop-up should appear on your phone as soon as you do that. Select “Always Allow From This Computer” and then tap “OK” to allow the connection.
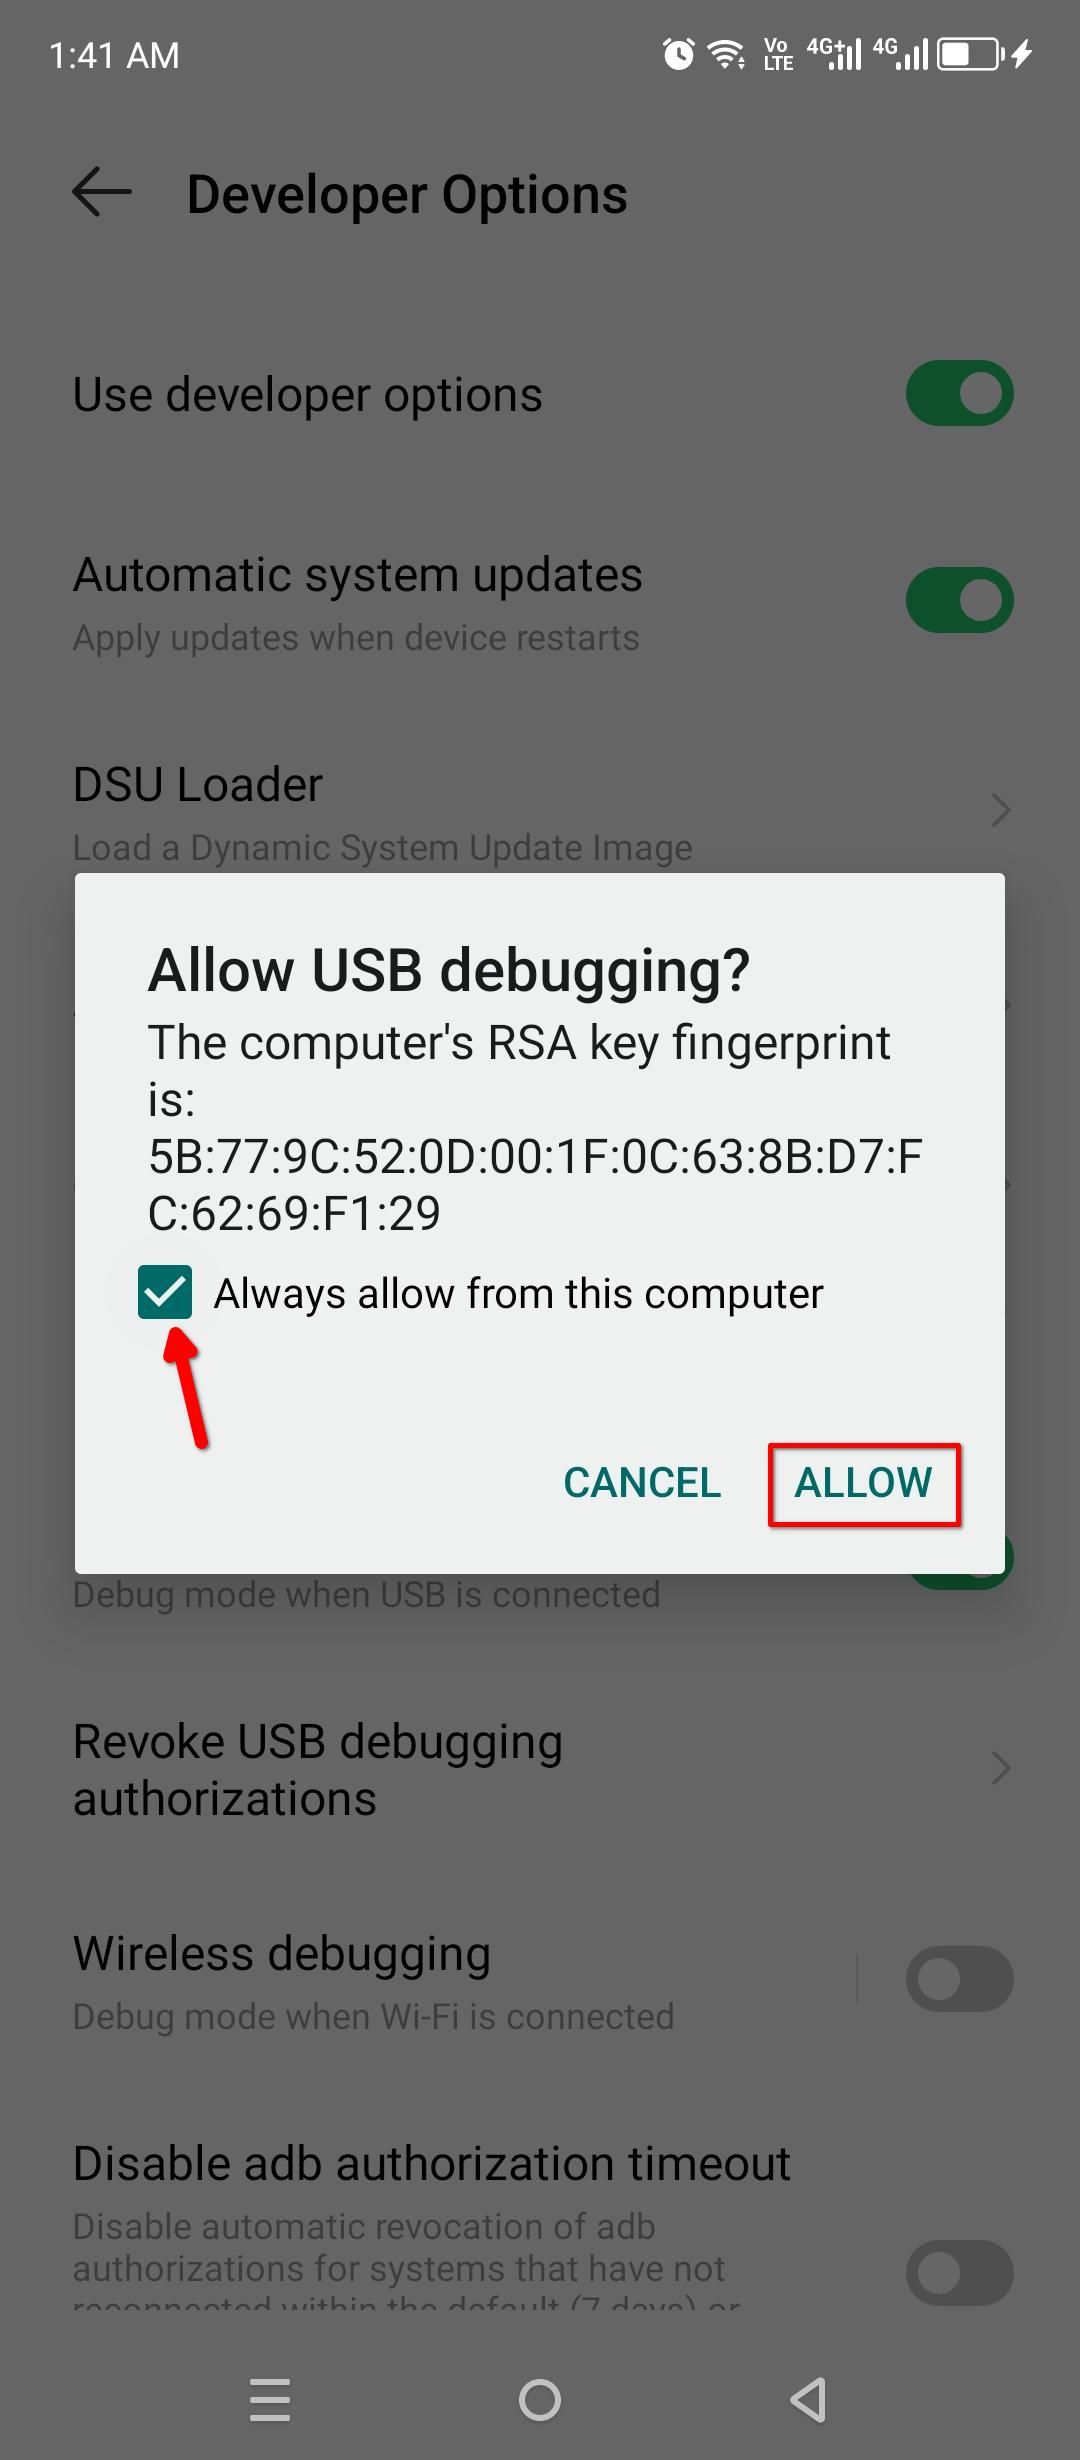
It’s crucial that you keep “Always Allow From This Computer” checked. It’ll safelist your computer. So you won’t have to manually grant this permission on your phone if it ever breaks.
Now back to the PowerShell window we just opened. Type the following command and press Enter:
adb devices
You’ll get a list of attached devices, along with their identifier strings.
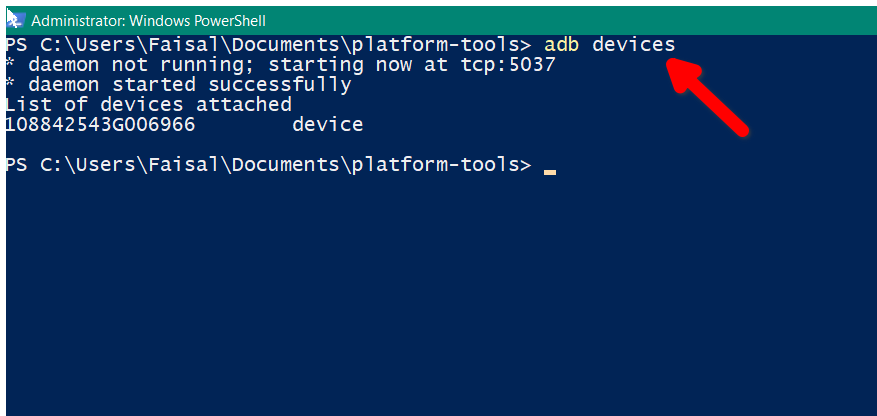
If the “adb devices” is returning a blank result, your computer is likely missing the relevant Android drivers. You can install the official drivers from the device manufacturer’s website, restart the computer, and try again.
Installing Scrcpy
Open the official Scrcpy repository on GitHub and download the relevant package for your operating system. I downloaded the “win64” zip archive. Extract it anywhere on your computer and open the extracted folder.
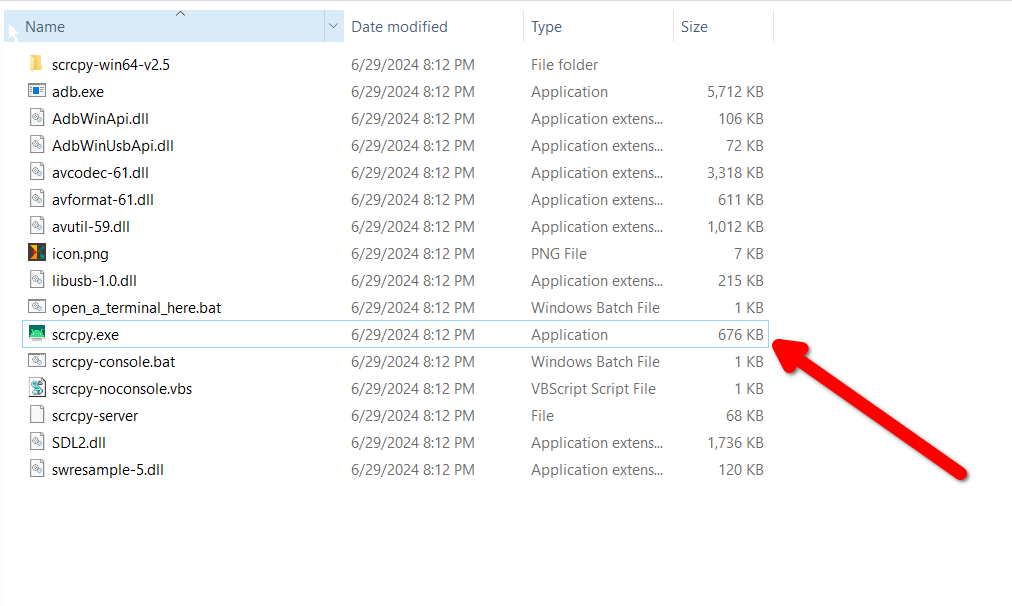
You can double-click “scrcpy.exe” to instantly mirror the Android screen on your computer. You should be able to interact with this mirrored screen using your mouse right away.
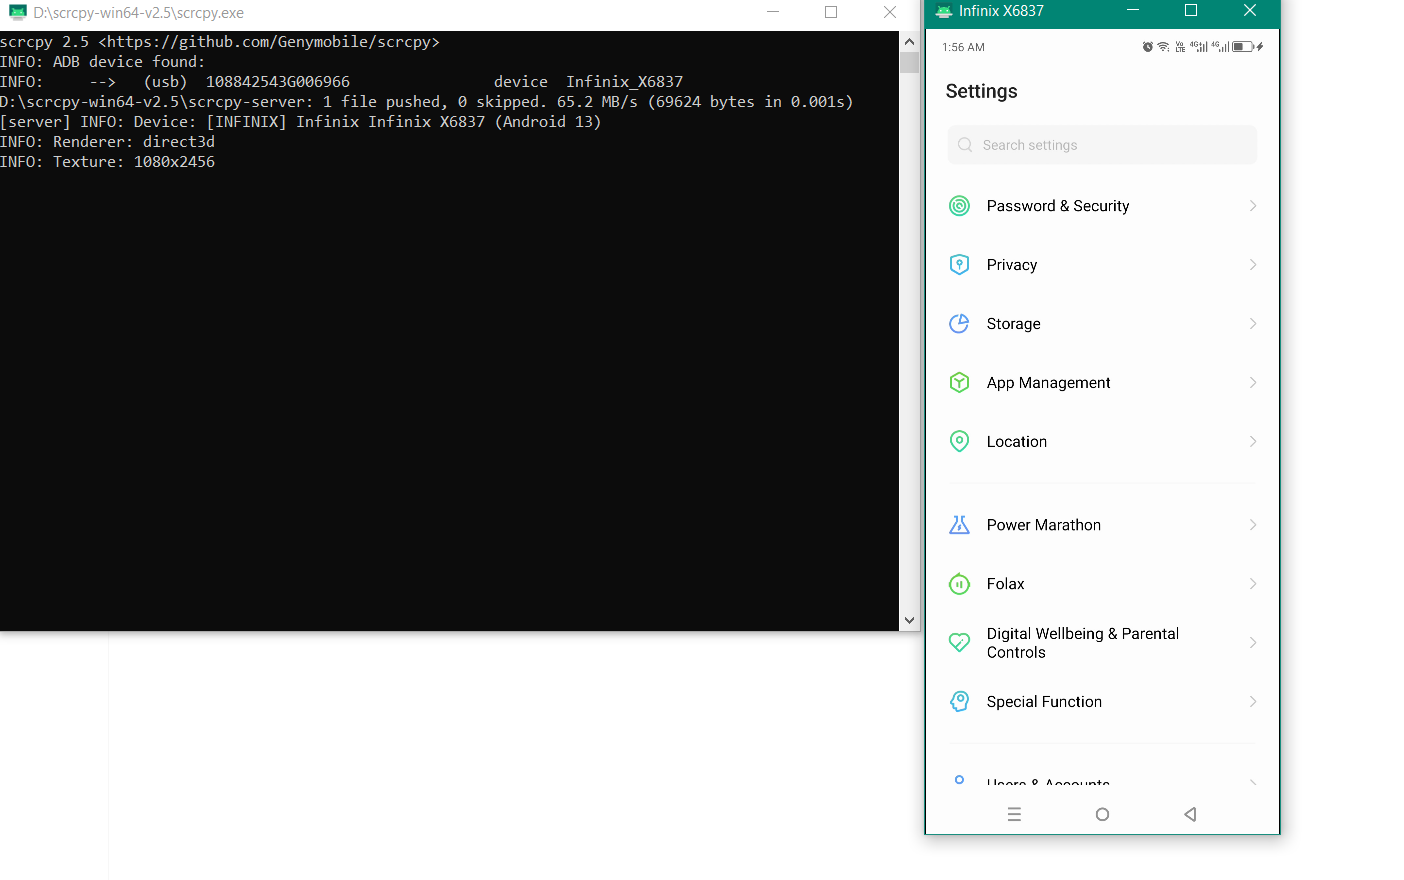
I tested Scrcpy on an older phone, and the mouse didn’t work on its own. If you’re having trouble with the mouse control, click the “open a terminal here” file. Once the command prompt window opens, type in the following command and press Enter.
scrcpy –mouse=uhid
Close
A rectangular window should automatically pop up, but it might be blank at first. Simply press the power button on your phone or the right-click button on your mouse to wake it up. Scrcpy will “capture” the cursor, and it’ll stick within the mirrored window. You can release it and use the mouse normally by pressing the Window or Alt key (Command or Option on Mac).
If the mouse isn’t working in the mirrored window, close the window and try again with this command: scrcpy –mouse=aoa
Scrcpy will only start streaming the screen after you’ve unlocked the phone. You can unlock it by using the fingerprint scanner. Alternatively, you can wake up the screen by right-clicking anywhere.
Recovering Data
There are two ways you can recover your data. The simplest solution is just opening a Scrcpy instance with mouse interaction enabled. From there, it’s a simple matter of uploading your important files, contacts, messages, and photos to the personal cloud service of your choice. Alternatively, you can use Nearby Share to send files to your computer.
Pulling files directly from your phone is a little bit trickier. One way to do it is to connect the phone to your computer using a USB cable. Then, mirror the phone screen via Scrcpy, use the mouse to pull down the notification shade, and set the USB preferences to “File Transfer.” The phone’s storage should pop up as a separate drive in Windows Explorer .
We’re going to run a different ADB command on our computer to get the job done.
Navigate to the “Platform Tools” folder, hold down shift, and right-click anywhere blank to open the context menu. Select “Open a Powershell Window Here,” just like you did before.

To make the transfer, you’ll need the location of the file on your phone. Open the file manager of your choice on your phone and locate the file you want to transfer (you can do this by interacting with the phone using Srncpy on your computer). Tap the file to open it, click the three-dot button, and select “File Info.” It’ll reveal the file’s location.
Close
Type the following command in the Powershell window and press Enter. Replace the example location in this command with the location of your file.
adb pull /storage/emulated/0/Pictures/pic.png
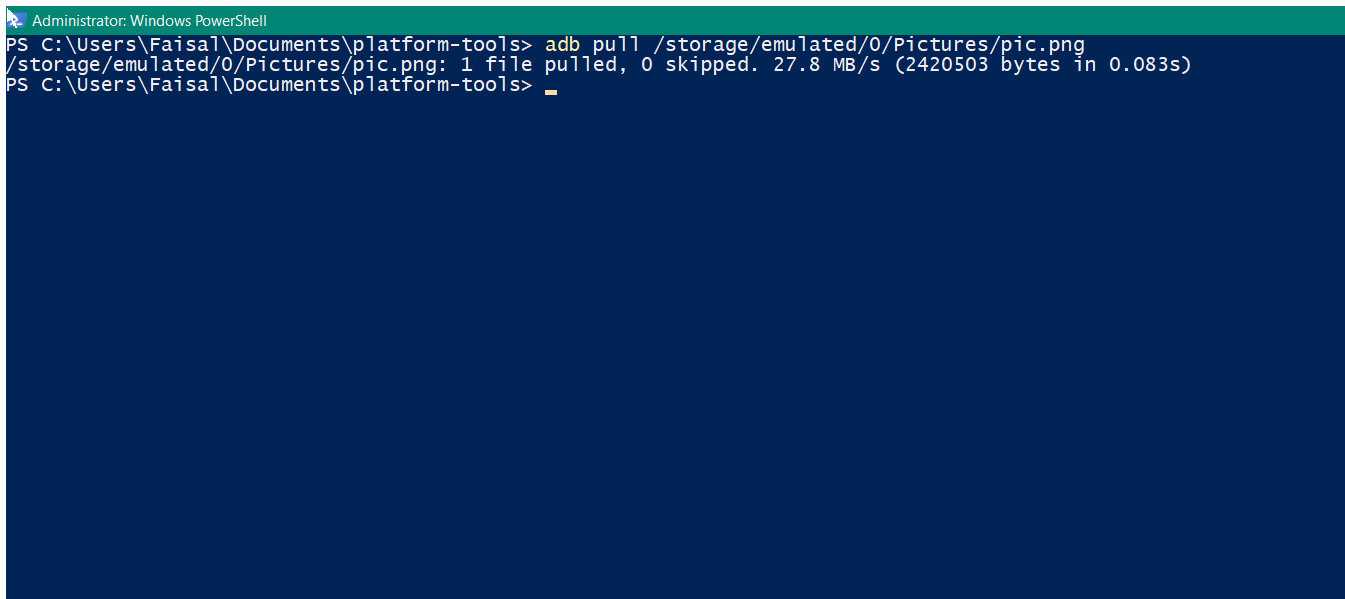
You’ll find this pulled file inside the Users directory in your Windows drive.
Sliding one toggle on your phone’s settings can save you the headache of taking it to the shop just to recover your important files.
Also read:
- [New] Top 8 4K Playback Powerhouses Unveiled
- [Updated] From Frantic Movements to Leisurely Views Crafting Spectacular Slow Motion Videos for Instragram for 2024
- [Updated] In 2024, Versatile Online Creations Simple and Inclusive Ideas for Your First Videos
- [Updated] Optimal Sound The Best Mic Bundles
- Download & Update MBox 2 Drives on Windows: Comprehensive Guide - Issue Resolved
- How To Do Infinix Note 30 5G Screen Sharing | Dr.fone
- HP Z440 Motherboard & Graphics Cards: Find, Update or Download All Necessary Drivers
- In 2024, Guide to Correct Age Information for TikTok Users
- In 2024, Pokemon Go No GPS Signal? Heres Every Possible Solution On Oppo Find X6 Pro | Dr.fone
- Latest Update for Corsair K70 - Access Software & Drivers Here!
- Navigating the World of Tech: Insights and Reviews at Tom's Hardware
- Quick and Simple Guide: Microsoft Drivers Downloading and Updating on Windows 11, 8 & 7
- Step by Step: Easy Installation of Pioneer DJ DDJ-SX2 Control Surface Software
- Title: Understanding the Benefits: Why Maintaining Active USB Debugging Is Essential for Android Users
- Author: Joseph
- Created at : 2024-10-17 16:03:00
- Updated at : 2024-10-25 06:36:07
- Link: https://hardware-help.techidaily.com/understanding-the-benefits-why-maintaining-active-usb-debugging-is-essential-for-android-users/
- License: This work is licensed under CC BY-NC-SA 4.0.