
Step-by-Step Tutorial: How to Take a Screencast on an Android Smartphone or Tablet

Step-by-Step Tutorial: How to Take a Screencast on an Android Smartphone or Tablet
Quick Links
- Can You Screen Record on Android?
- How to Record Screen on Android Without an App
- How to Screen Record on Android With a Third-Party App
- How to Record Audio on Android
- Where Are Screen Recordings Saved?
Key Takeaways
- Android 11 introduced a built-in screen recorder tool, making it easier to record your Android screen without a third-party app.
- The screen recorder tool can be accessed from the Quick Settings panel, but older Android devices will still need a third-party app for screen recording.
- Screen recordings on Android are saved in different folders depending on the device and file manager used, such as “Screen Recordings” or “Movies.”
There was a time when it was difficult to screen record on Android. Thankfully, those days are behind us, and now there is a built-in Android screen recorder. We’ll show you how to record your screen on Android.
Can You Screen Record on Android?
For a long time, if you wanted to make a screen recording of your Android device you needed to use a third-party app. However, Android 11 introduced a native screen recorder tool. This is a much better solution.
As long as your Android phone or tablet is running Android 11 or later , you can use the built-in screen recorder tool. However, you’re not out of luck if you have an outdated Android phone . You can still use a third-party tool to record your Android screen. We’ll be covering both the built-in and third-party options in this guide.
How to Record Screen on Android Without an App
Android’s built-in screen recording tool can be accessed from the Quick Settings . It can’t be opened from the app drawer. So, before we can use the Screen Recorder, we need to move it into the Quick Settings panel. This process varies depending on your device.
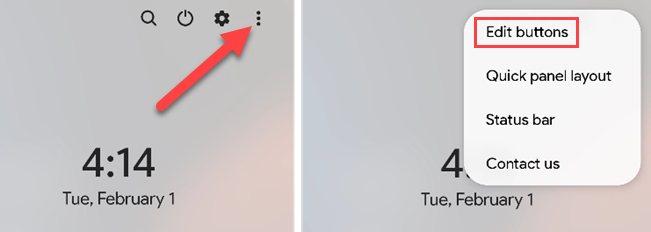
On a Samsung Galaxy phone , swipe down twice from the top of the screen to reveal the full Quick Settings panel. Tap the three-dot menu icon in the top right and select “Edit Buttons” from the menu.
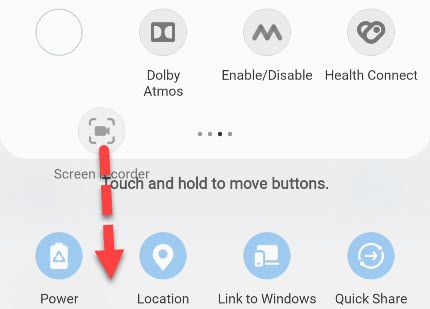
The top section is “Available Buttons;” these are not currently in the Quick Settings panel. Tap and hold the “Screen Recorder” button to drag it to the bottom section. Lift your finger to drop it.
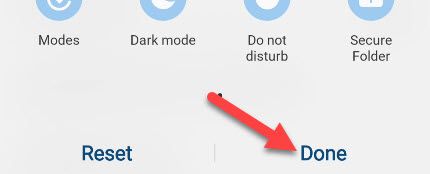
Tap “Done” at the bottom of the screen to confirm the placement.
On a Google Pixel phone — and many other non-Samsung devices — swipe down twice from the top of the screen and tap the pencil icon.

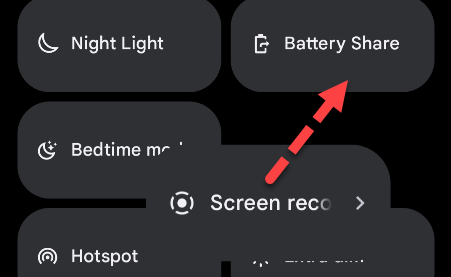
The tiles at the top section are already in the Quick Settings area. Find the “Screen Record” tile, tap and hold, and then drag the tile to the top area. Lift your finger to drop the tile.
Tap the back arrow in the top-left corner when you’re done.

Now we can actually use the screen recorder. Swipe from the top of the screen to open the Quick Settings again, and now tap the “Screen Recorder” tile.
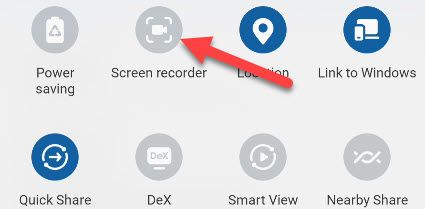
A menu with some options will appear. First, you can decide if you’d like to record audio with the screen recording. Here are the options you’ll have:
- Device Audio/Media: Records the audio playing on your device.
- Microphone: Records you and your surroundings through the device’s microphone.
- Device Audio/Media and Microphone: Records both the device’s audio and through the microphone.
- None (or toggle off): Does not record audio.
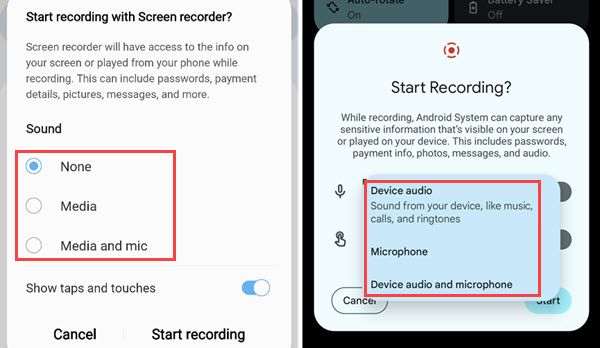
The next choice is whether or not you want to show your touches on the screen. If enabled, a small circle will show your taps and swipes.
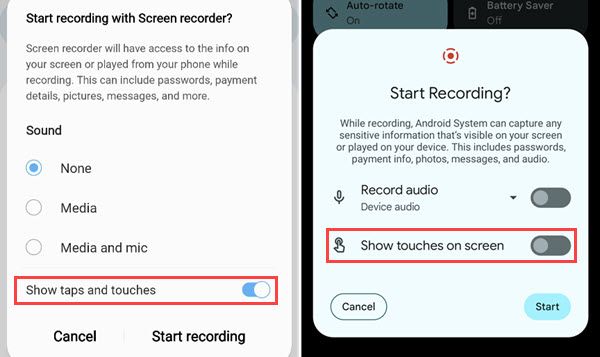
Samsung Galaxy / Google Pixel
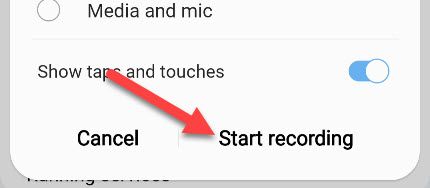
Lastly, tap “Start” or “Start Recording” when you’re ready and you’ll see a countdown appear.
When you’re done recording, swipe down from the top of the screen to show the notifications and tap “Stop” or simply tap the notification to end the recording.
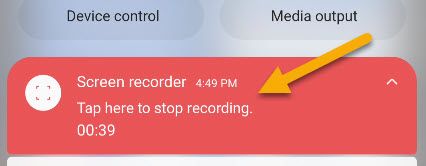
That’s it! The recording will be saved to the “Movies” or “Screen Recordings” folder on your device.
How to Screen Record on Android With a Third-Party App
If your device is running a version of Android older than Android 11 — or you don’t like the built-in screen recorder — you can use a third-party app to get the job done. We like an app called “AZ Recorder, “ which is available for free in the Play Store.
First, open the app and you’ll have a choice to make. You can control the app from a floating toolbar or the notification shade. If you want the pop-up toolbar, you’ll need to tap “Allow” to give the app permission to draw over other apps. We’ll be using the notification method.
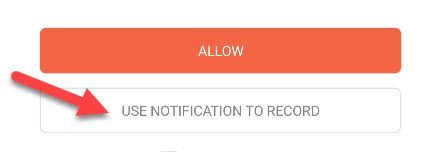
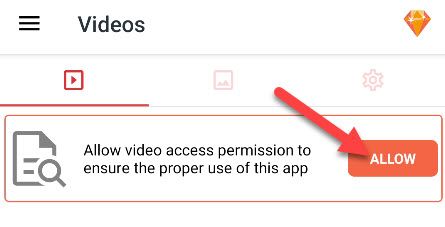
Next, we need to give the app permission to save videos to your device. Tap “Allow” on the message at the top of the screen.
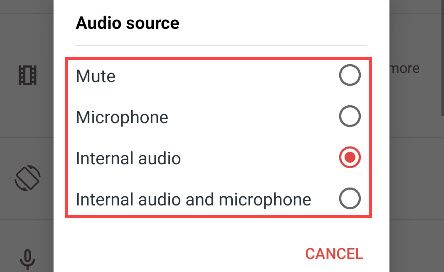
Before we record the screen, let’s tap the gear icon tab to adjust the settings. You have a bunch of choices here, but the one we want right now is “Audio Source.”
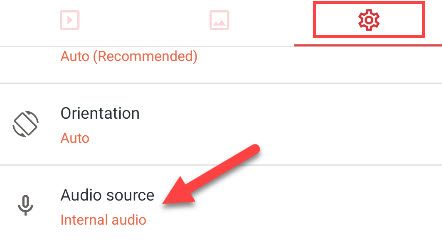
You have a few options for “Audio Source”:
- Mute: Doesn’t record any audio.
- Microphone: Records audio from your device’s microphone.
- Internal Audio: Records audio playing on your device.
- Internal Audio and Microphone: Records audio from your device and microphone.
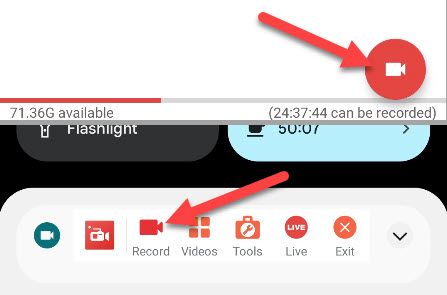
Now you can start recording from the app itself — with the floating button in the bottom right — or from the toolbar in the notification shade.
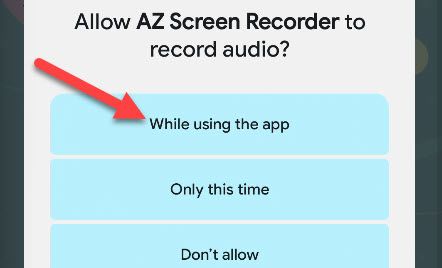
After you tap the record button, you’ll be asked to grant the app permission to record audio if you chose to do so. Select “While Using the App.”
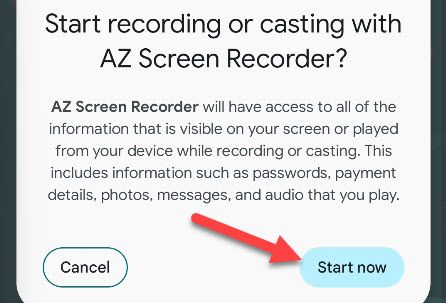
Finally, tap “Start Now” to begin the screen recording.
When you’re done recording, swipe down from the top of the screen and tap “Stop” from the AZ Recorder notification.

A pop-up will appear with shortcuts to share, delete, or edit the video.
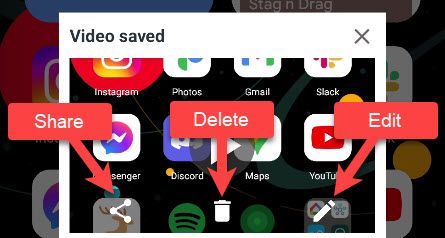
That’s it! The recording will be saved to the “AzScreenRecorder” folder on your device.
How to Record Audio on Android
There are several simple apps you can use to record audio on Android . Both Samsung and Google have voice recorder apps for their respective devices. However, in the context of this guide, we’ll be talking about recording audio along with recording video of your screen.
As shown in the previous two sections, you have the option to record audio while screen recording with Android built-in screen recorder and AZ Recorder . Regardless of which one you choose, you have three options for audio:
- Device Media/Audio: Records the audio playing on the device itself.
- Microphone: Records audio of you and your surroundings through the device’s microphone.
- Device Media/Audio and Microphone: Records audio from the device and microphone.
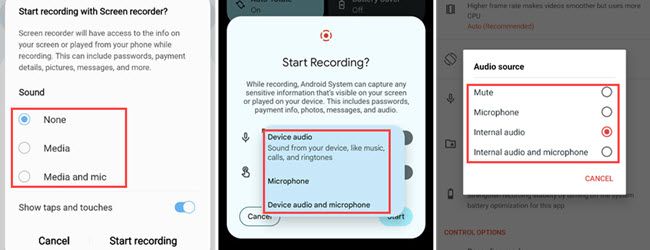
Whichever recording method you use, make sure to select one of the audio options before recording your screen.
Where Are Screen Recordings Saved?
Now that you’ve made some screen recordings, you may be wondering where they were saved. Screen recordings on Android are typically saved in a few different places, depending on your device and file manager.
Samsung Galaxy devices save screen recordings in the aptly named “Screen Recordings” folder. Google Pixel devices save them to the “Movies” folder. However, if you’re using Google Photos on a Samsung device, the recordings will be under the “Camera” folder.

Third-party apps will typically save the recordings in a subfolder in the “Screen Recordings” or “Movies” folder labeled with the app’s name. For example, AZ Recorder saves videos to the “AzScreenRecorder” folder.

These are good rules of thumb to keep in mind for other Android devices and third-party apps.
That’s everything you ever wanted to know about how to screen record on Android. The built-in Android screen recorder is a nice convenience, but there are great third-party options as well. It’s easy to create screen recordings on Windows 11 , Windows 10 , macOS , iPhone , and Chromebooks too.
Also read:
- [Updated] 'QuickCapture' Vs 'Recordify' Comparative Recorder Analysis 2023
- 2024 Approved Luxury Makeup Techniques Unveiled
- 7 Fixes for Unfortunately, Phone Has Stopped on Vivo V29e | Dr.fone
- 立即將 AVI 影片轉換成 MP4 的線上免費方法 - 運用 Movavi 技術
- Crashing Woes Continue for Intel Notebook CPUs, Reports Indicate Troubling Pattern of Failures During Tests
- Easy Install: Latest Driver Download for Your HP Ink Advantage DeskJet 3755 - Compatible with Windows OS
- Effective Strategies to Log Your Google Voice Talks for 2024
- Eliminate Your HP Speaker Troubles on Windows 11/8/7 with These Proven Fixes
- In 2024, How to Change Lock Screen Wallpaper on Nokia G42 5G
- In 2024, How to Unlock Infinix Note 30 Pro Phone with Broken Screen
- In 2024, How To Use Special Features - Virtual Location On Vivo V29? | Dr.fone
- Intel to Tackle CPU Malfunction Problems by Addressing High Voltage Concerns: Anticipate Patch in August
- Revamping Audio Performance: A Cross-Platform Method for Driver Update in Win11/Win10/Win7
- Ultimate Selection: Elite Vertical Mouse Picks for the Year 2024
- Title: Step-by-Step Tutorial: How to Take a Screencast on an Android Smartphone or Tablet
- Author: Joseph
- Created at : 2024-10-17 21:21:33
- Updated at : 2024-10-25 02:14:21
- Link: https://hardware-help.techidaily.com/step-by-step-tutorial-how-to-take-a-screencast-on-an-android-smartphone-or-tablet/
- License: This work is licensed under CC BY-NC-SA 4.0.