
Step-by-Step Guide: Performing a Hard Reset on Your Non-Bootable Chromebook

Step-by-Step Guide: Performing a Hard Reset on Your Non-Bootable Chromebook
Quick Links
- Run Powerwash to Wipe Your Chromebook’s Data
- Disable Developer Mode to Reinstall ChromeOS
- Create Recovery Media to Reinstall ChromeOS
- Force-Boot Into Recovery Mode
- Perform a Hard Reset
Chromebooks store your Google account information and data from installed apps, so you’ll want to delete that data when selling or giving away your computer. Here’s how to securely wipe your Chromebook.
Chromebooks can be erased and reset to factory settings, which is primarily useful when giving the computer to someone else, but it’s also required for exiting Developer Mode . Your data in Google Drive and other cloud services is not affected, but your Downloads folder and other local data is erased. If you’ve tampered heavily with your Chromebook, such as installing Windows , you’ll need to do a bit of extra work to reset it .
Run Powerwash to Wipe Your Chromebook’s Data
The Powerwash feature wipes all your personal data off your Chromebook. When you power on the Chromebook, you’ll see the first-time setup screen where you have to set everything up by connecting to Wi-Fi and signing into a Google account. Use Powerwash when you’re done with your Chromebook and you want to sell it or give it to someone else.
First, open the Settings app on your Chromebook. You can search for it in the apps list, or click the system tray at the bottom-right corner of the screen and click the Settings gear icon.
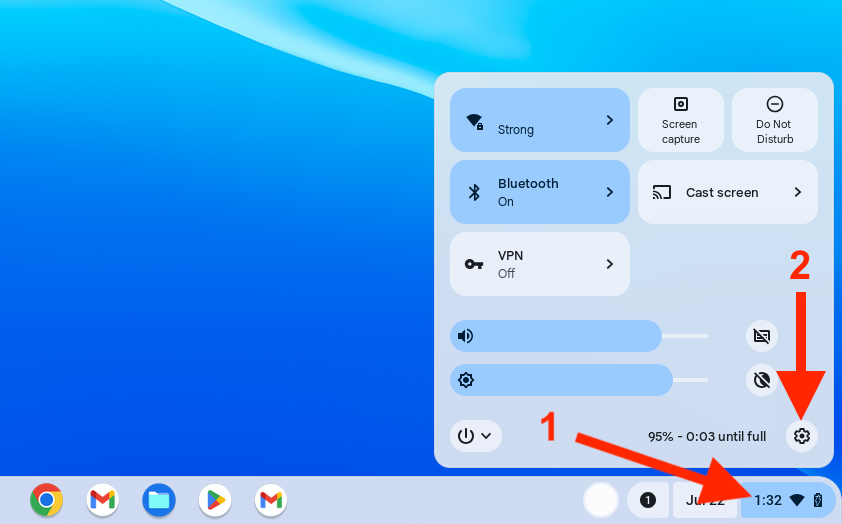
Next, search for “powerwash” in the Settings app search bar, or navigate to System preferences > Powerwash. You should see a menu item for Powerwash with a Reset button.
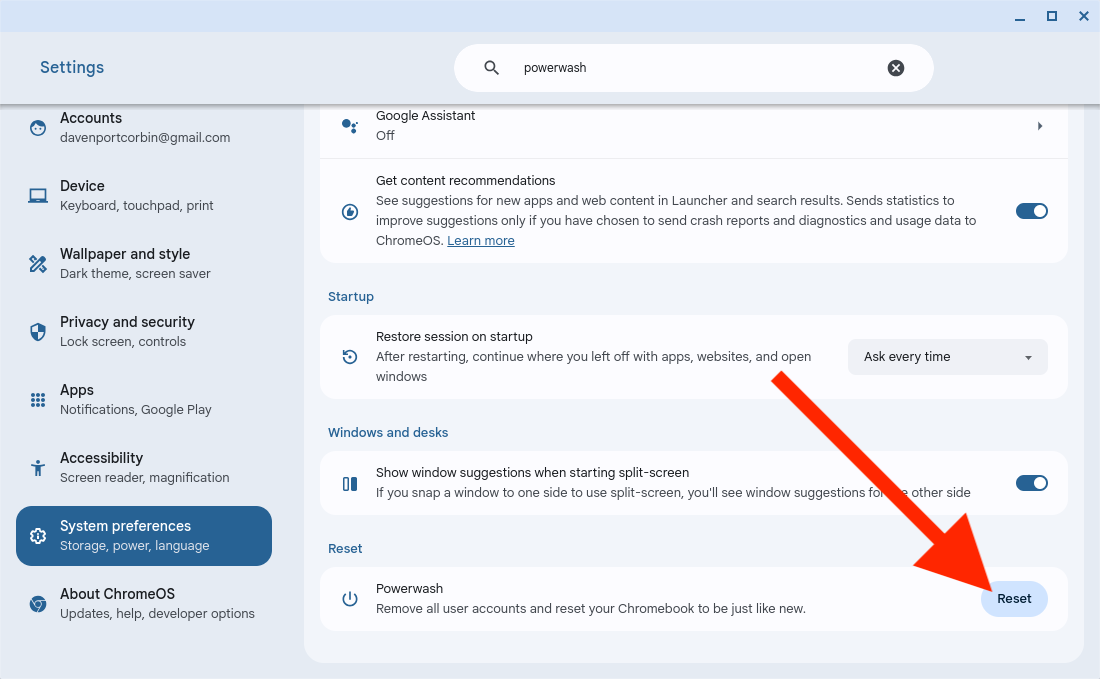
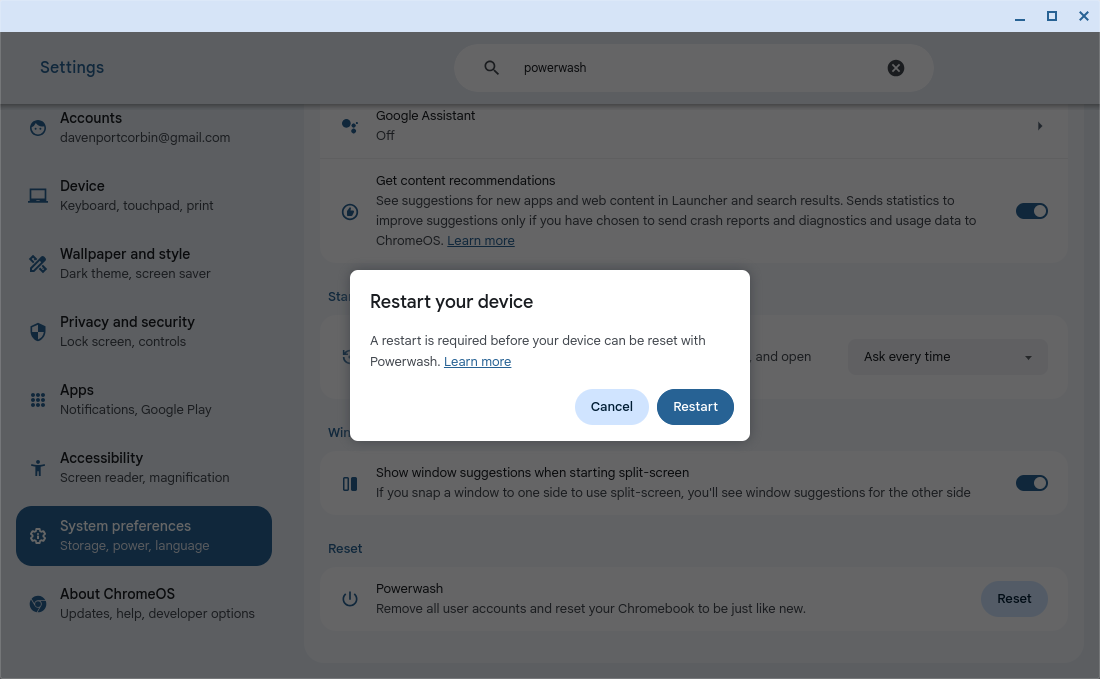
You will be asked to restart your Chromebook so the process can start. Click the Restart button.
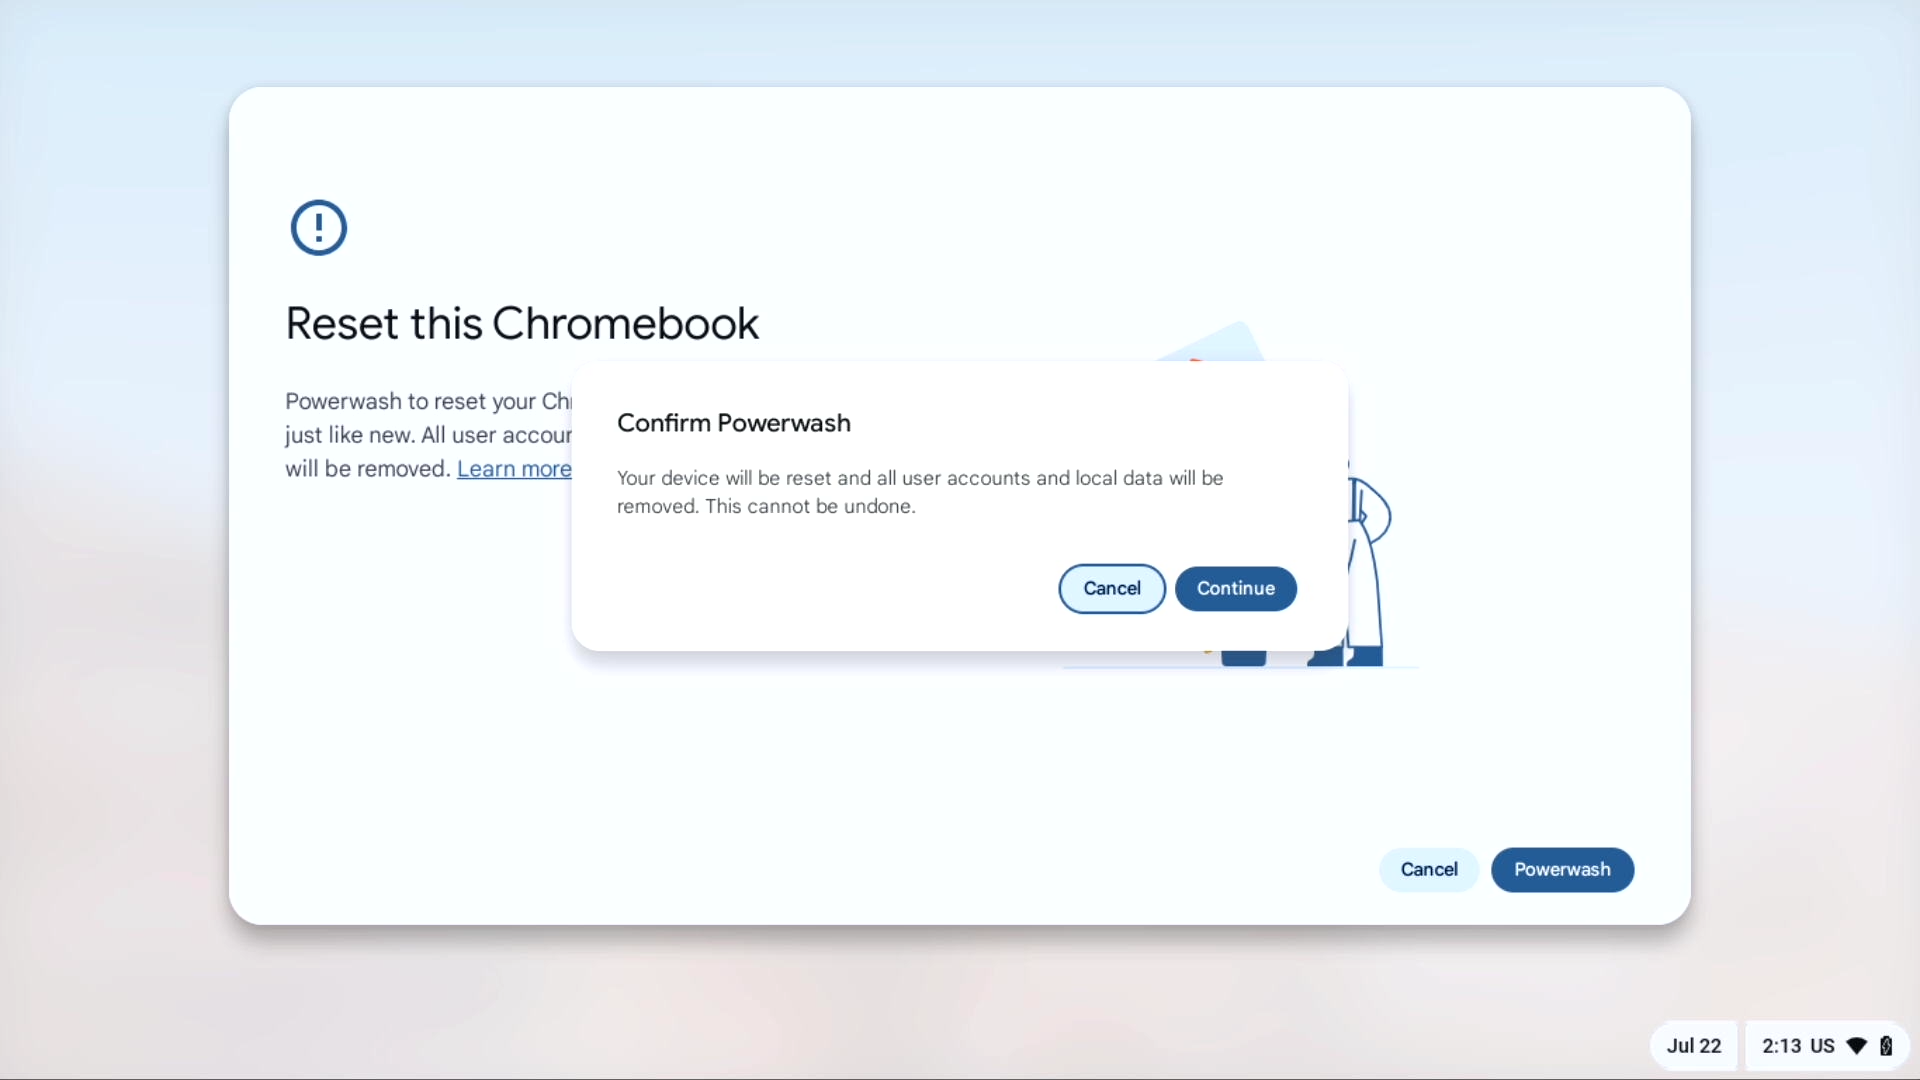
Finally, your Chromebook will reboot to the Powerwash menu, reminding you that everything stored locally will be wiped and can’t be recovered. Click the Powerwash button, then confirm the wipe, and the process will start.
When the wipe is complete, the Chromebook will reboot and return to the first-time setup screen. You now have a fresh Chromebook.
Disable Developer Mode to Reinstall ChromeOS
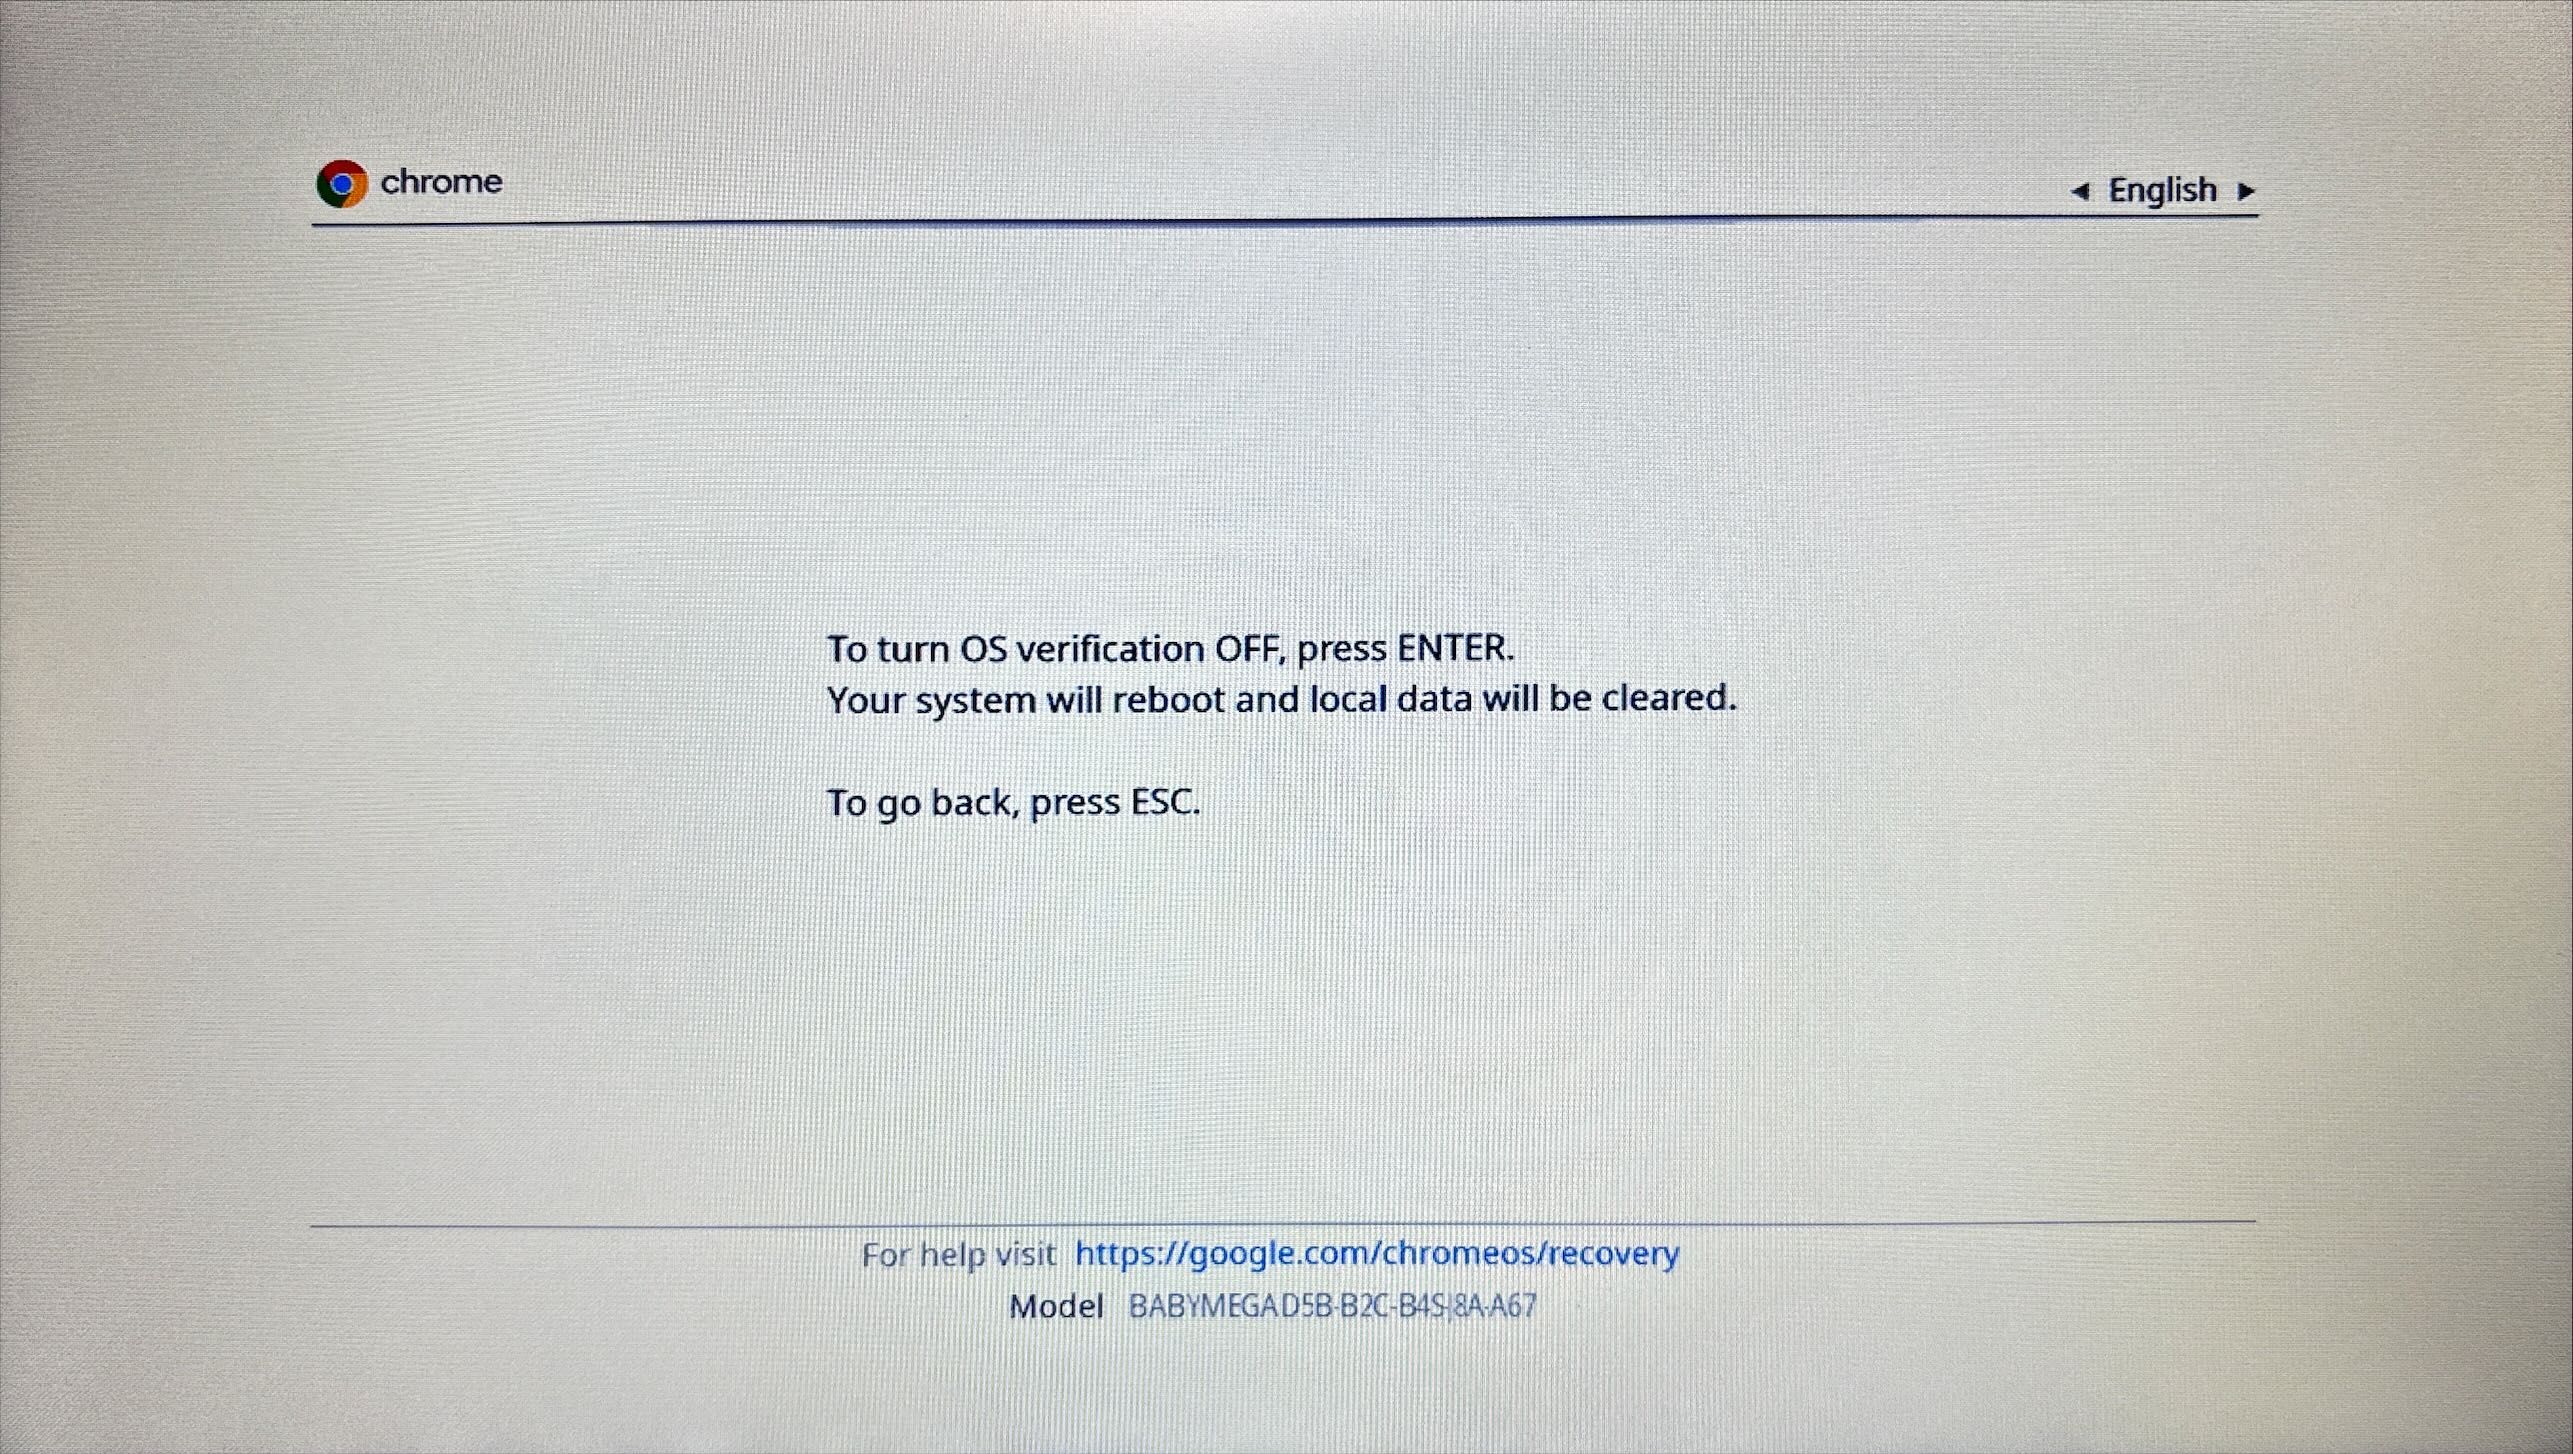
If you’ve enabled developer mode and modified your Chromebook’s software (maybe you’ve installed Linux alongside ChromeOS ), you can disable developer mode to erase all your customizations. When you disable developer mode, your Chromebook will wipe all user data and reset all system files to their default state.
Restart your Chromebook and you’ll see the standard “OS verification is off” message. Instead of pressing Ctrl+D to skip this warning, press the Space button to re-enable OS verification and disable developer mode.
Corbin Davenport / How-To Geek
You’ll end up with a like-new Chromebook and whatever changes you made to the operating system will be gone. If you want to mess around with the low-level operating system files again, you’ll have to re-enable developer mode.
Create Recovery Media to Reinstall ChromeOS
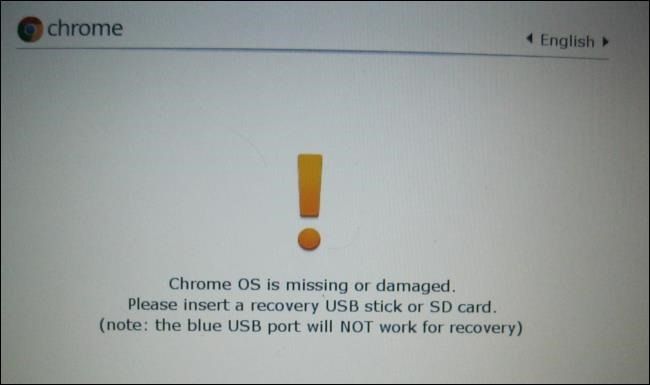
You may see a “ChromeOS is missing or damaged” message if your Chromebook can’t boot. You’ll need to create recovery media from another Windows, Mac, Linux, or ChromeOS computer so you can reinstall ChromeOS.
You need to install Google Chrome, if you haven’t already, then install the Chromebook Recovery Utility from the Chrome Web Store. You can open it by clicking its extension button in Chrome’s toolbar. If you don’t see it, click the extensions button in the toolbar, and it should appear in the overflow menu.

The Recovery Utility will walk you through finding your Chromebook model and selecting a USB drive to use as the recovery drive. It will then download the proper recovery image and write it to the USB drive.
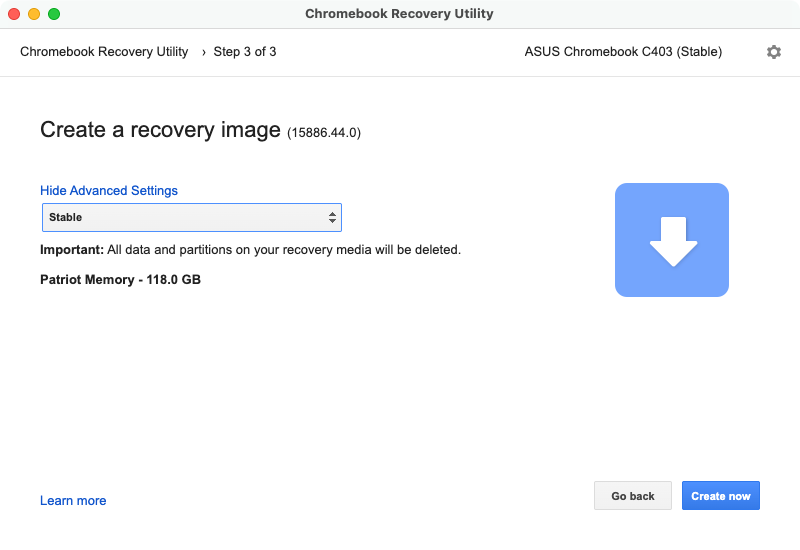
Once the recovery drive is ready, boot up your Chromebook. When you see the “ChromeOS is missing or damaged” message, insert the recovery media and your Chromebook will begin reinstalling ChromeOS.
Force-Boot Into Recovery Mode
If you’d like to reinstall ChromeOS and you don’t see the “ChromeOS is missing or damaged” message on your screen, you can force your Chromebook to boot into recovery mode. If you have a typical Chromebook laptop, press and hold down the Esc and Refresh keys on the keyboard, then press (but do not hold) the Power button.

ASUS
Some Chromebooks have the power button near the keyboard, but on other models like the ASUS Chromebook Flip, it’s on the side of the laptop. You can let go of all the keys when you see a message on the screen.
If you have a desktop Chromebox or Chromebit, there should be a small recovery button somewhere on the box, as seen in the below image. You need to turn off the computer, push a paperclip or pushpin into the hole, then turn on the Chromebox. You can take the paperclip or pushpin out when you see a message on the screen.

ASUS
If you have a ChromeOS tablet, press and hold the Volume Up, Volume Down, and Power buttons for at least 10 seconds, then release the buttons.
Perform a Hard Reset
If your Chromebook isn’t booting at all, you may need to perform a hard reset . You can do this by pressing Refresh + Power on modern Chromebooks. On a Chromebox, you’ll need to disconnect and reconnect the power cable.
On older Chromebooks, you may need to pull the battery and reinsert it or use a special reset button. Google has additional documentation available for help with specific models.
You can quickly get back up to speed after reinstalling ChromeOS. Your data and apps will be synced when you sign back in with the same Google account. It works just like logging into your Google account on a new Chromebook.
Also read:
- [New] In 2024, Expert Tips for Creating Engaging Screencasts
- [Updated] Exploring the Best Face-Enhancing Apps for iPhones & Samsungs
- GPD Reveals Teaser: Innovative Dual-Display OLED Laptop Set to Challenge ASUS ZenBook Duo
- Harnessing Battery Power and 3D Printing Technology for the Flying Lotus' Revolutionary AIO Workstation Designed From a Customized Laptop Chassis
- How Microsoft's Cutting-Edge Copilot+ Makes 2024 Laptops Obsolete – Is It Time for a Change?
- How to Bypass FRP from OnePlus Nord N30 SE?
- In-Depth Analysis of the Dell XPS 13 (7390): The Ultimate 2-in-1 Hybrid Laptop
- Introducing the Razer Blade 18: Premium Gaming Laptop at a Steep $4,799 with I9-14900HX & RTX 4090
- Join the Communication Revolution with Tango - Enjoy Endless Free Messaging & Calling Options.
- Lenovo Laptop Transformation Story: Swapping Out the Bad Keyboard for a Titanium Shell & Mechanical Switch Setup
- Master Your Hardware Choices - The Ultimate Guide by Tom's Tech Specialists
- Mastering Hardware Solutions at Tom's Electronic Resource
- Mastering Technology Essentials Through Tom's Expertise
- Overcome Gaming Hurdles: Solving PC Crashes in Forza Horizon 4 Easily!
- Top 5 Exhilarating Virtual Track Gaming Experiences
- Voice Modification Hacks Including the Magic One
- Why Your WhatsApp Location is Not Updating and How to Fix On Infinix Zero 30 5G | Dr.fone
- Title: Step-by-Step Guide: Performing a Hard Reset on Your Non-Bootable Chromebook
- Author: Joseph
- Created at : 2024-10-15 19:21:54
- Updated at : 2024-10-18 18:38:04
- Link: https://hardware-help.techidaily.com/step-by-step-guide-performing-a-hard-reset-on-your-non-bootable-chromebook/
- License: This work is licensed under CC BY-NC-SA 4.0.