Solve Your Mac's Starting Woes with a Tutorial on Utilizing Recovery Mode for Repairs
Solve Your Mac’s Starting Woes with a Tutorial on Utilizing Recovery Mode for Repairs
Quick Links
- How to Boot Into Recovery Mode on a Mac
- Run First Aid From Your Recovery Partition
- If All Else Fails: Reinstall macOS
Key Takeaways
- Access Recovery Mode to diagnose and fix issues or reinstall macOS.
- Use Disk Utility to run First Aid on the drive. Back up your data if the drive is failing.
- Reinstall macOS if there are problems with the operating system itself.
If your Mac won’t boot, don’t panic. There’s a hidden Recovery Mode that you can use to either diagnose and fix any issues or to reinstall macOS completely should you need to. Here’s how to use it.

How to Boot Into Recovery Mode on a Mac
The first thing you’ll need to do is boot into Recovery Mode. Fortunately, that’s easy, although the instructions differ depending on what Mac you’re using. Start by turning off your Mac, then:
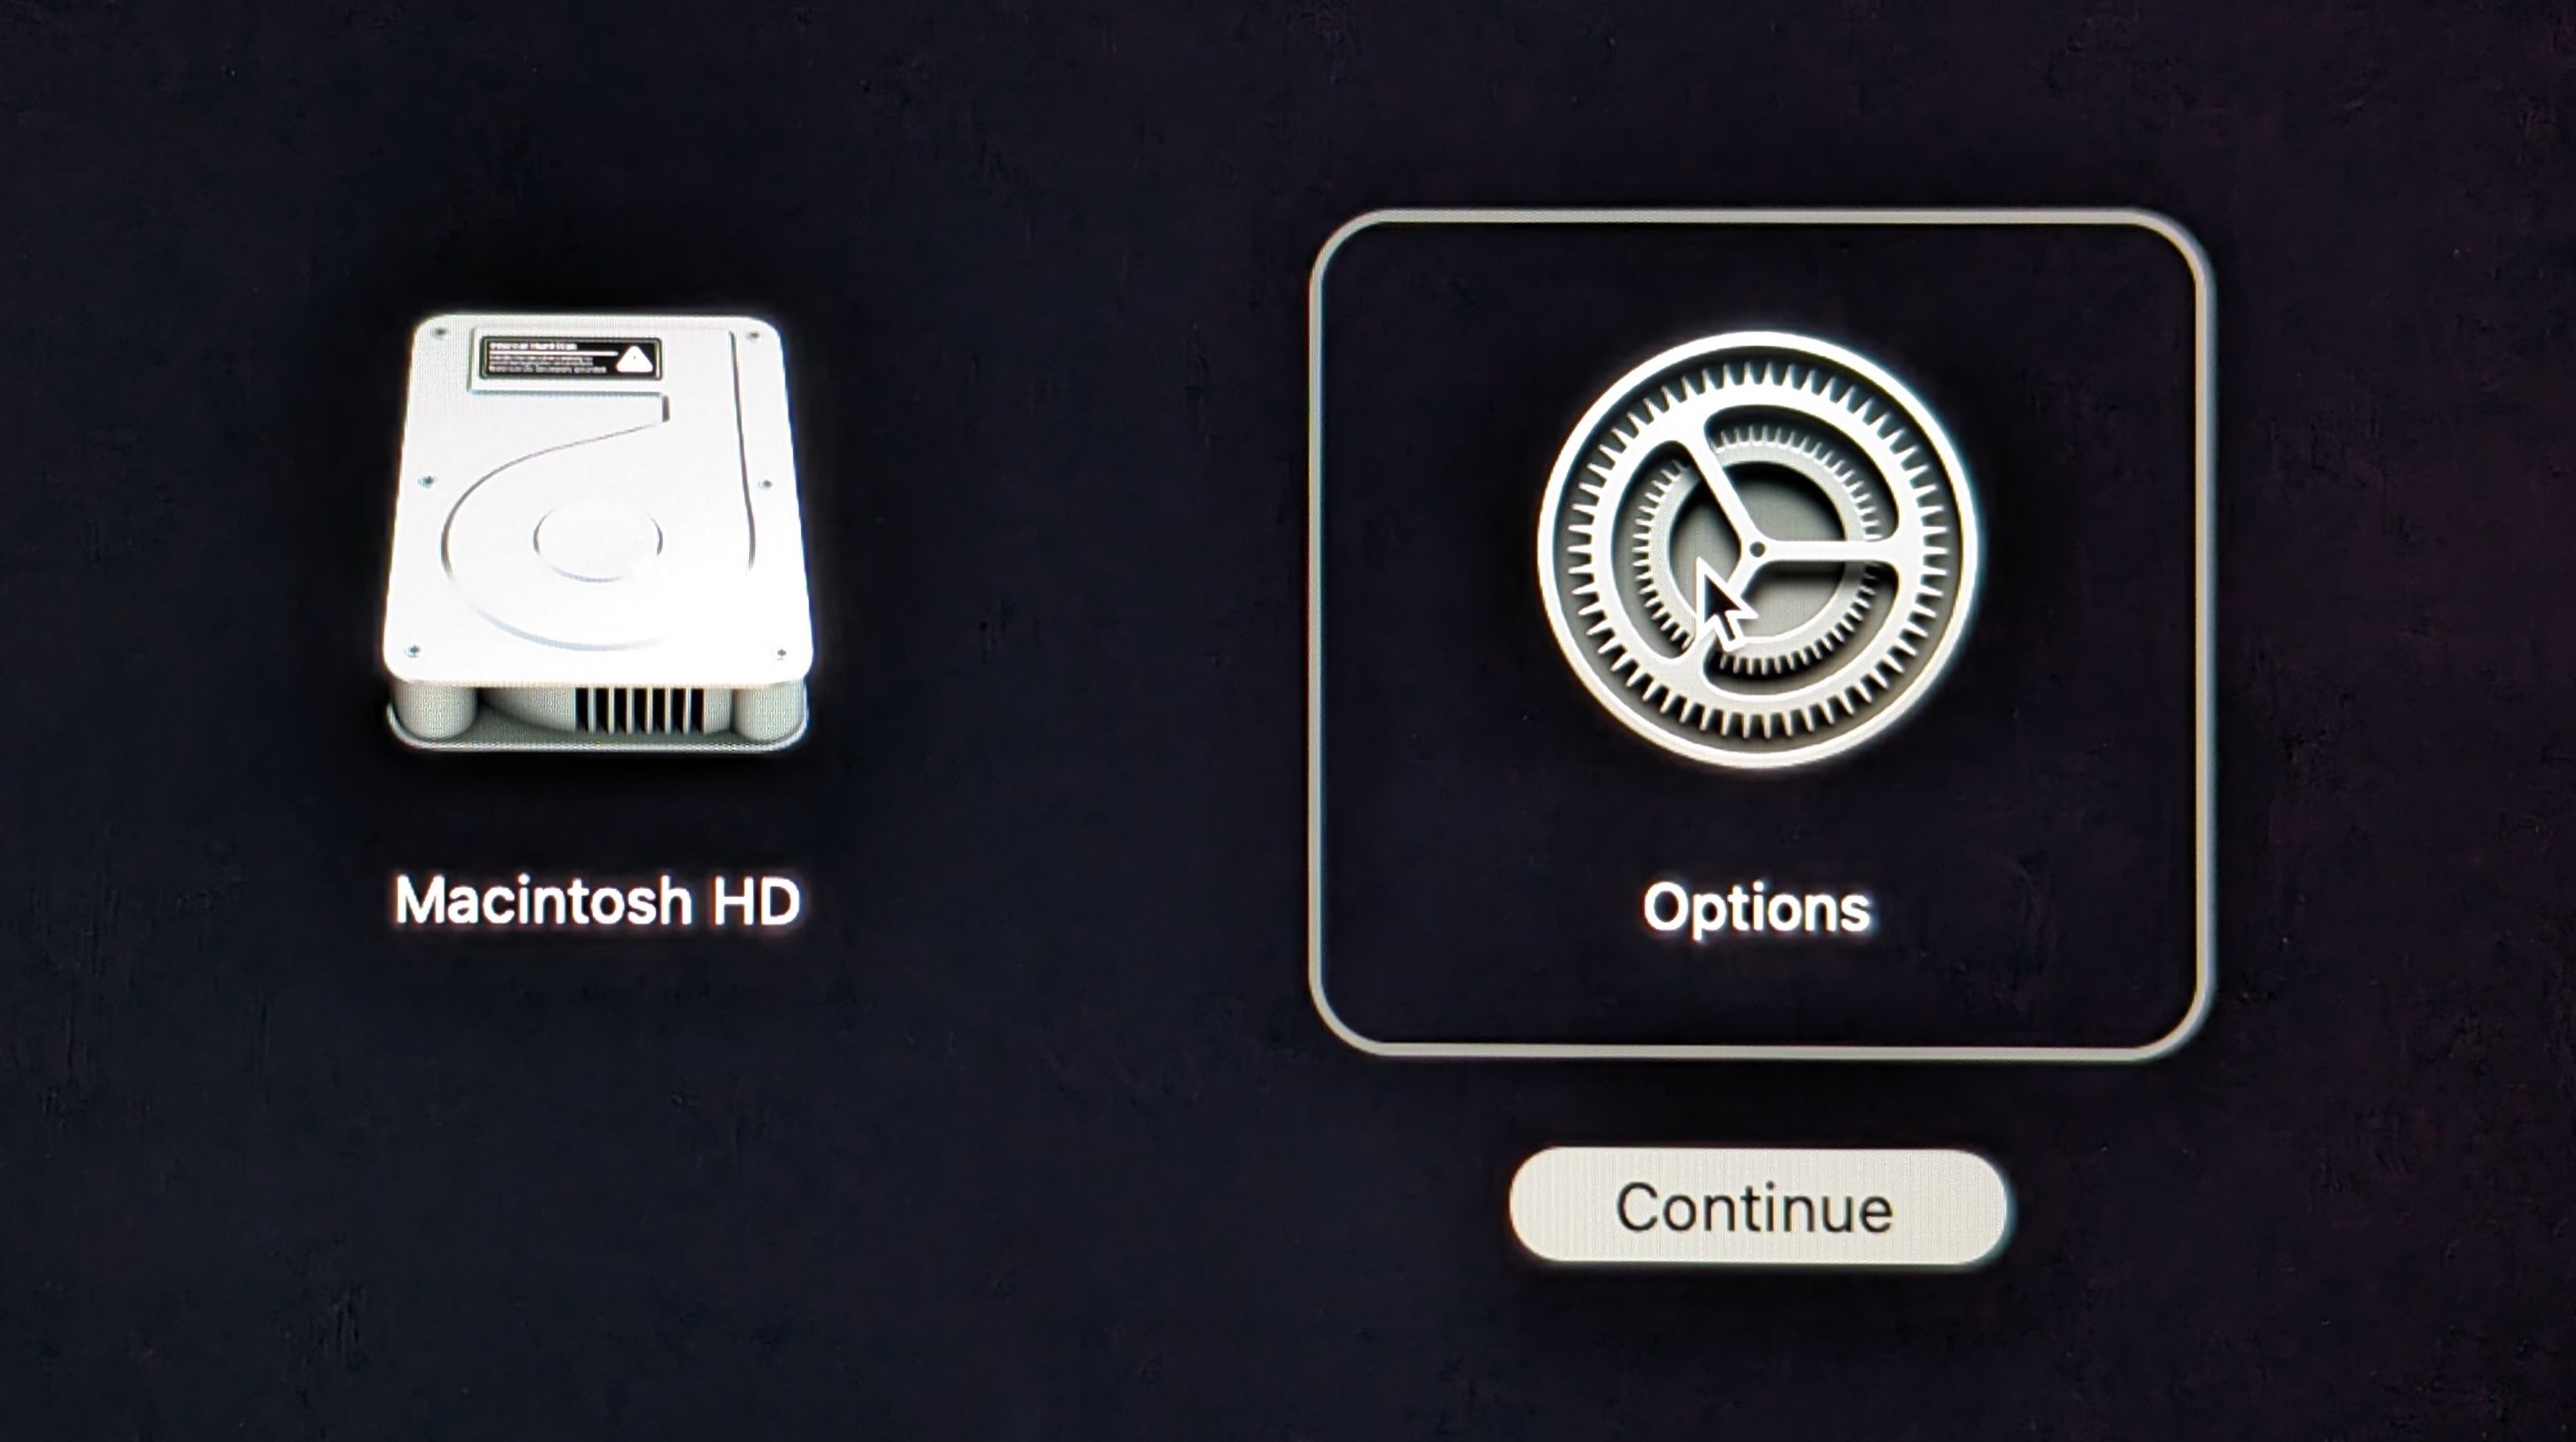
- On a Mac with Apple Silicon: Hold down the power button until “Loading Startup Options” appears. Then select Options > Continue and enter the password for your account when prompted.
- On an Intel Mac: Power on your computer while holding down the Command+R keys until you see the “macOS Utilities” screen. Enter your password if prompted.
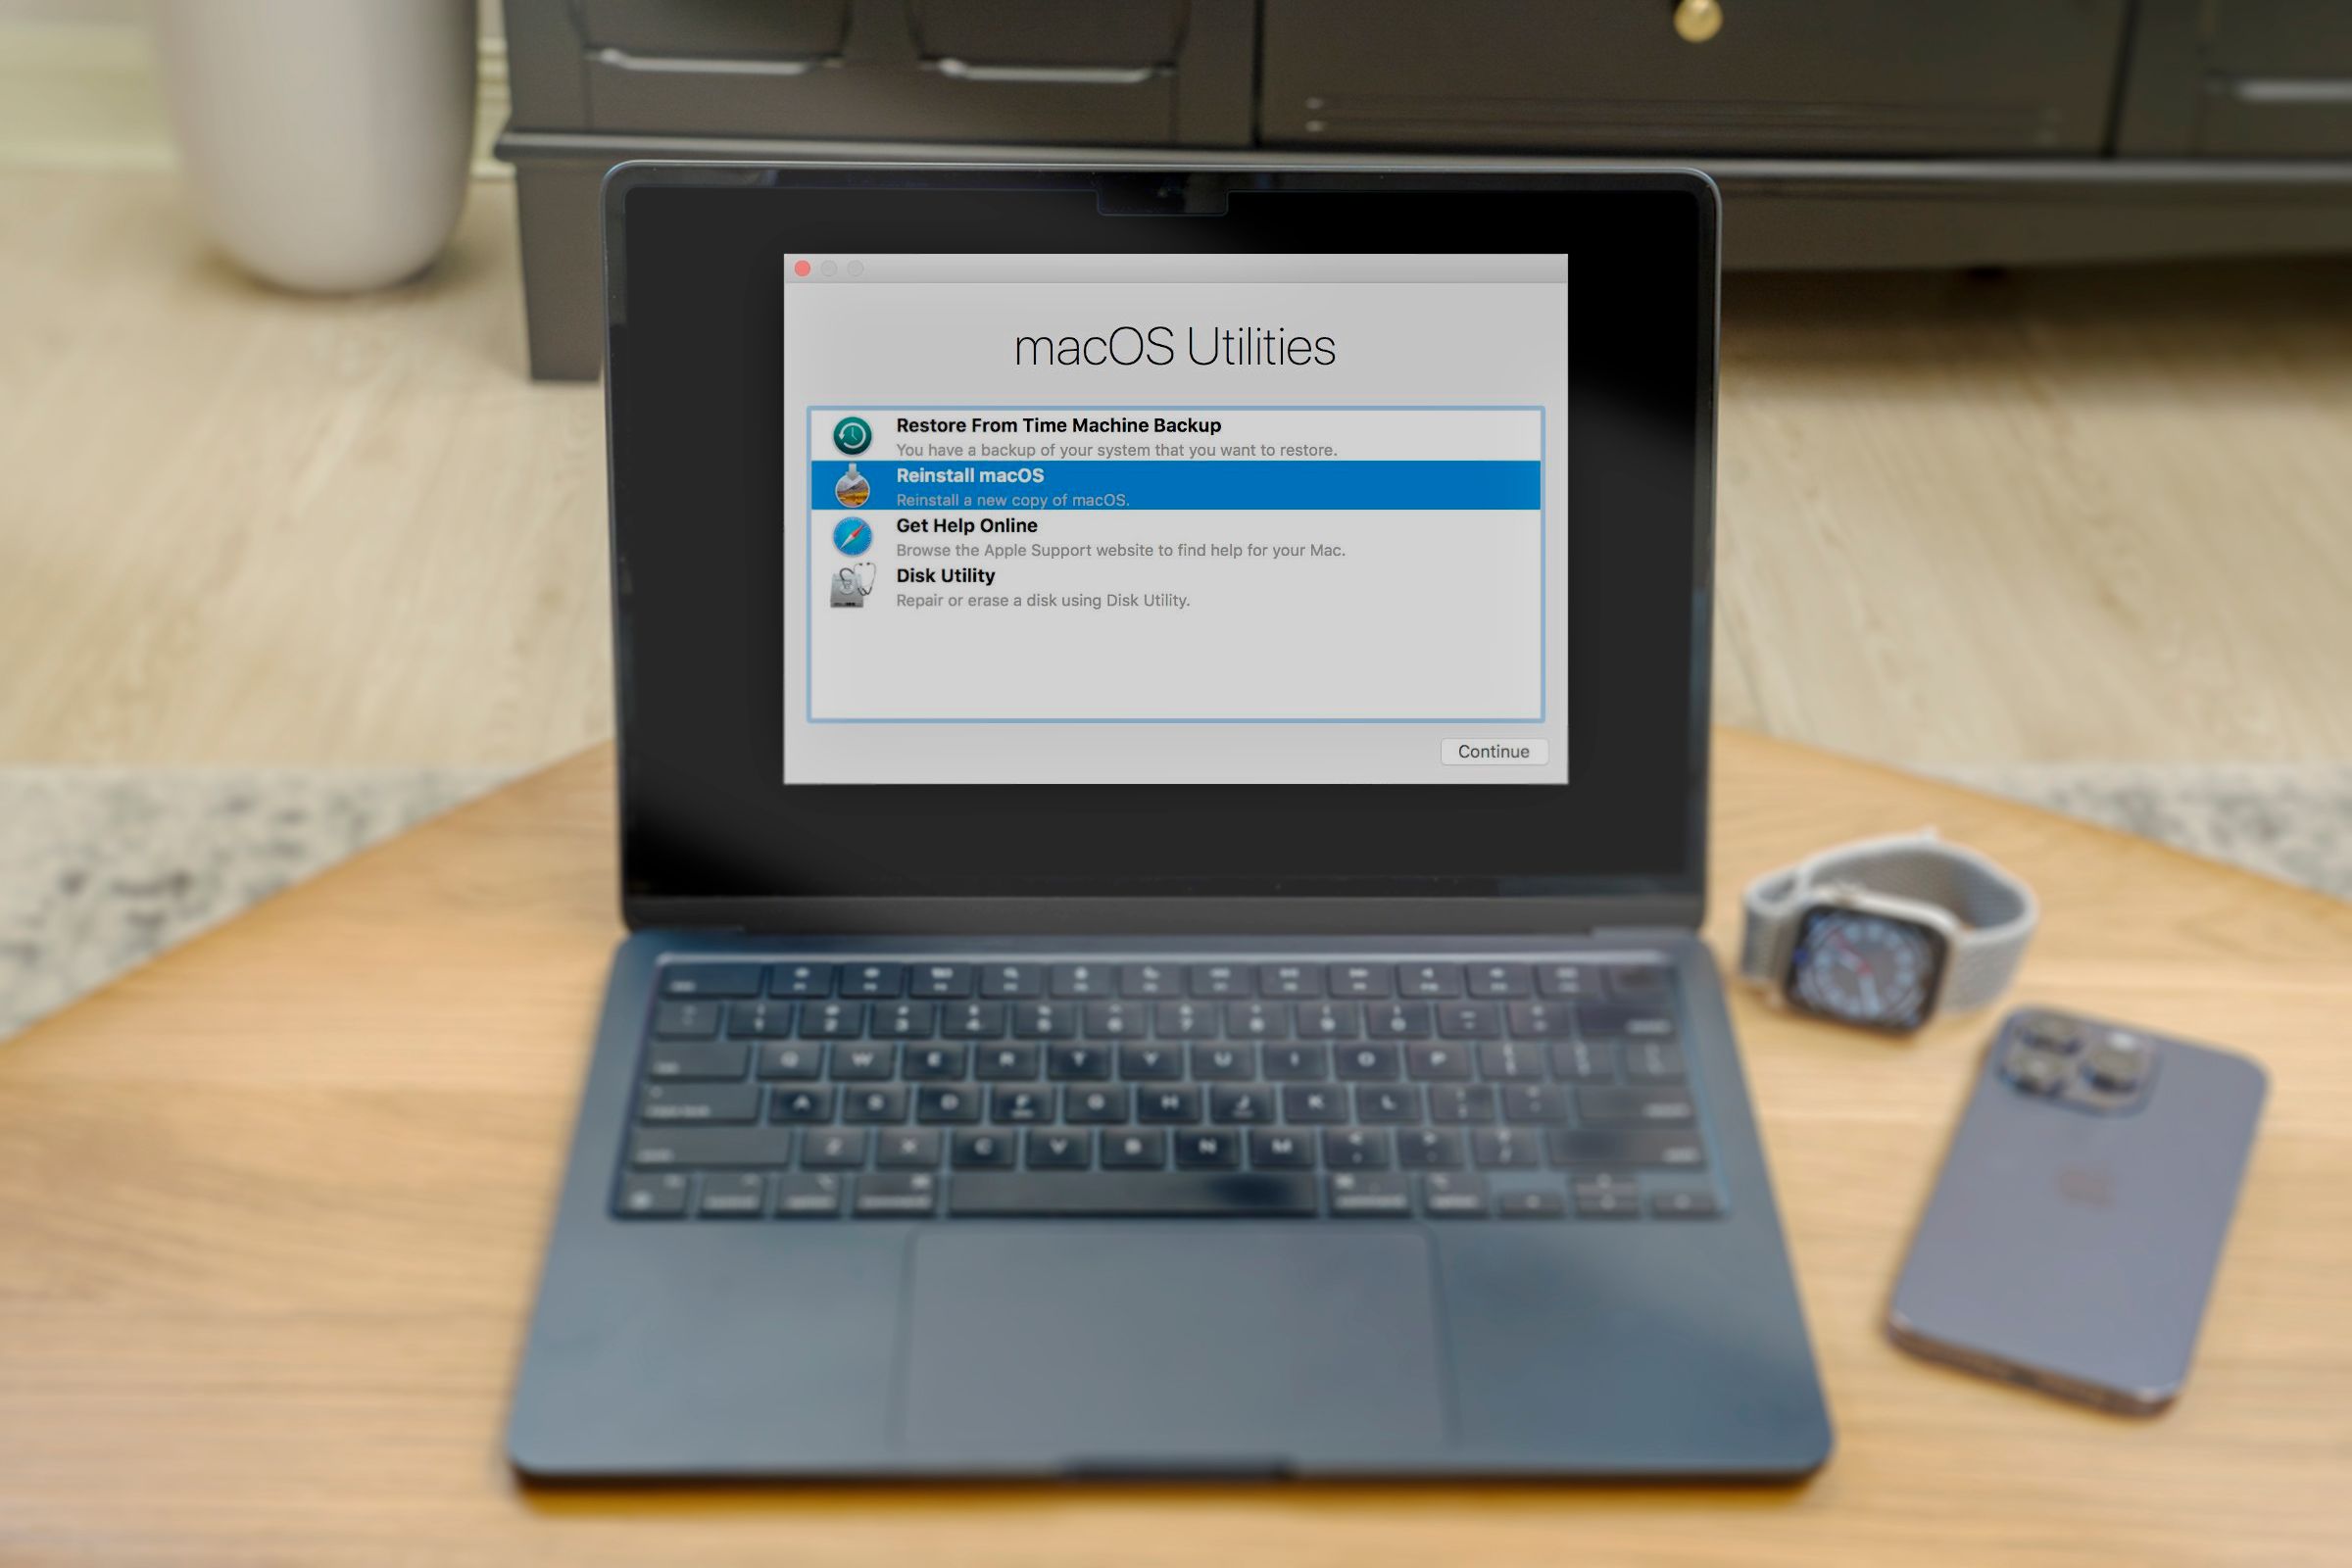
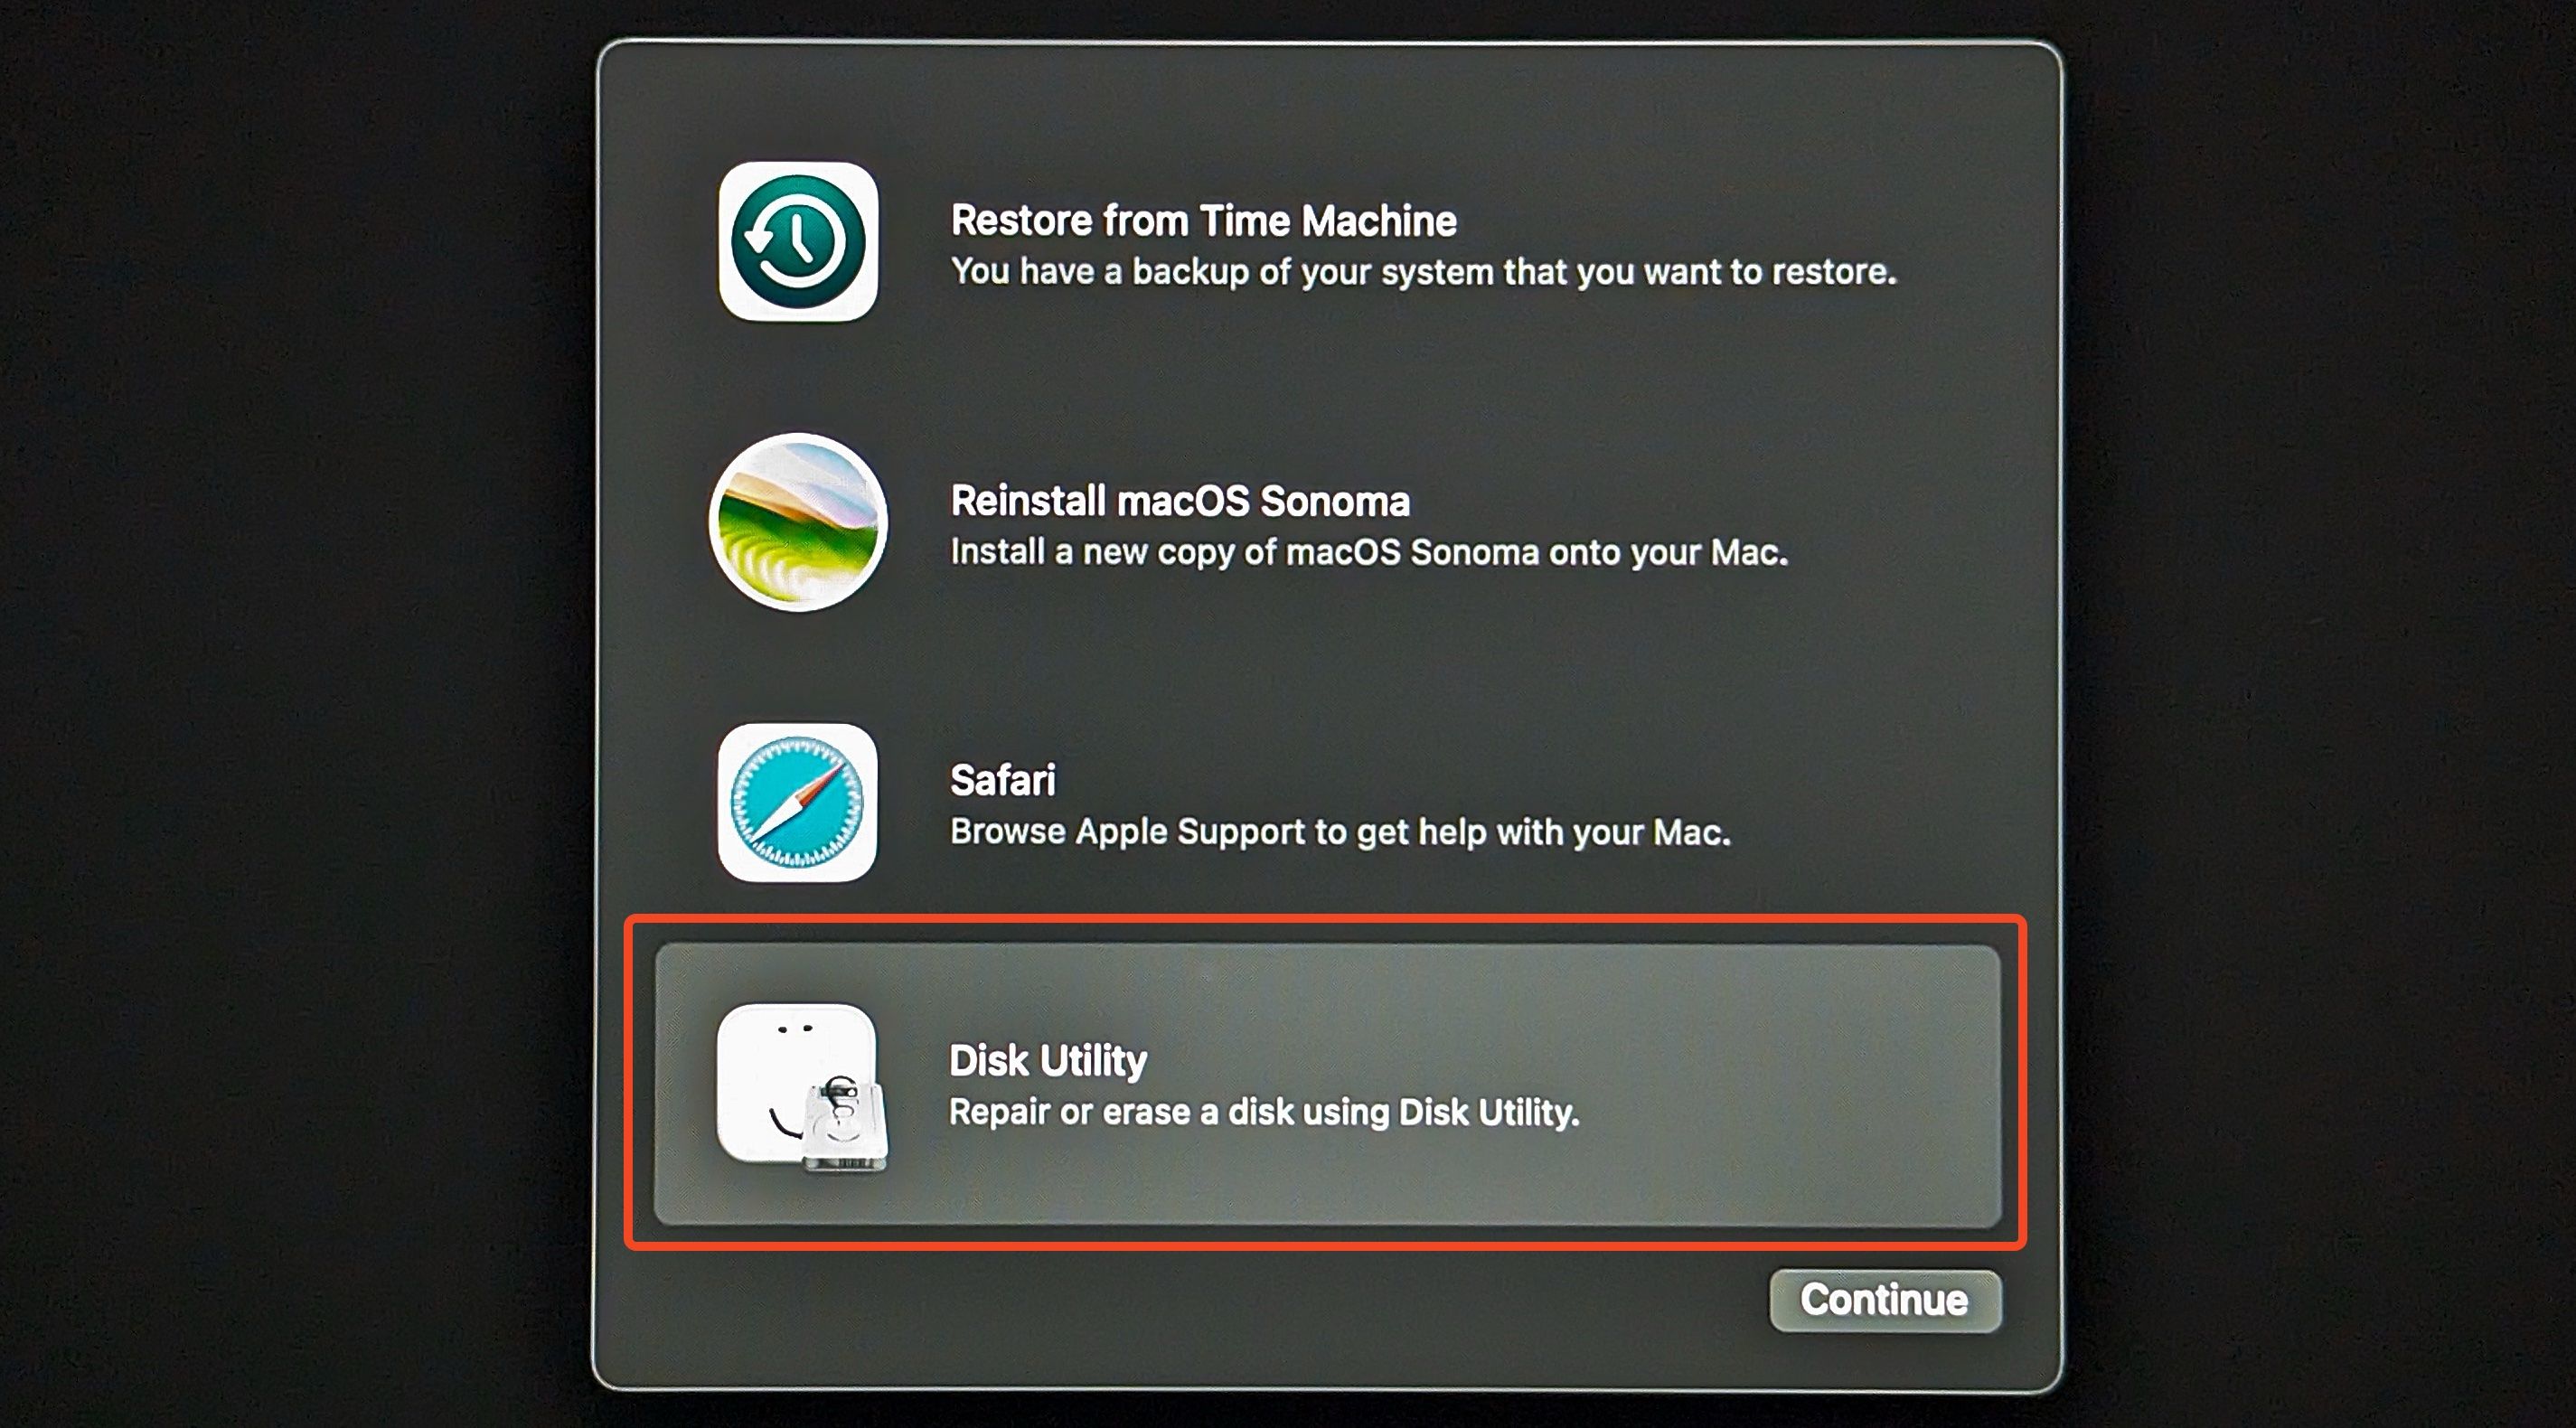
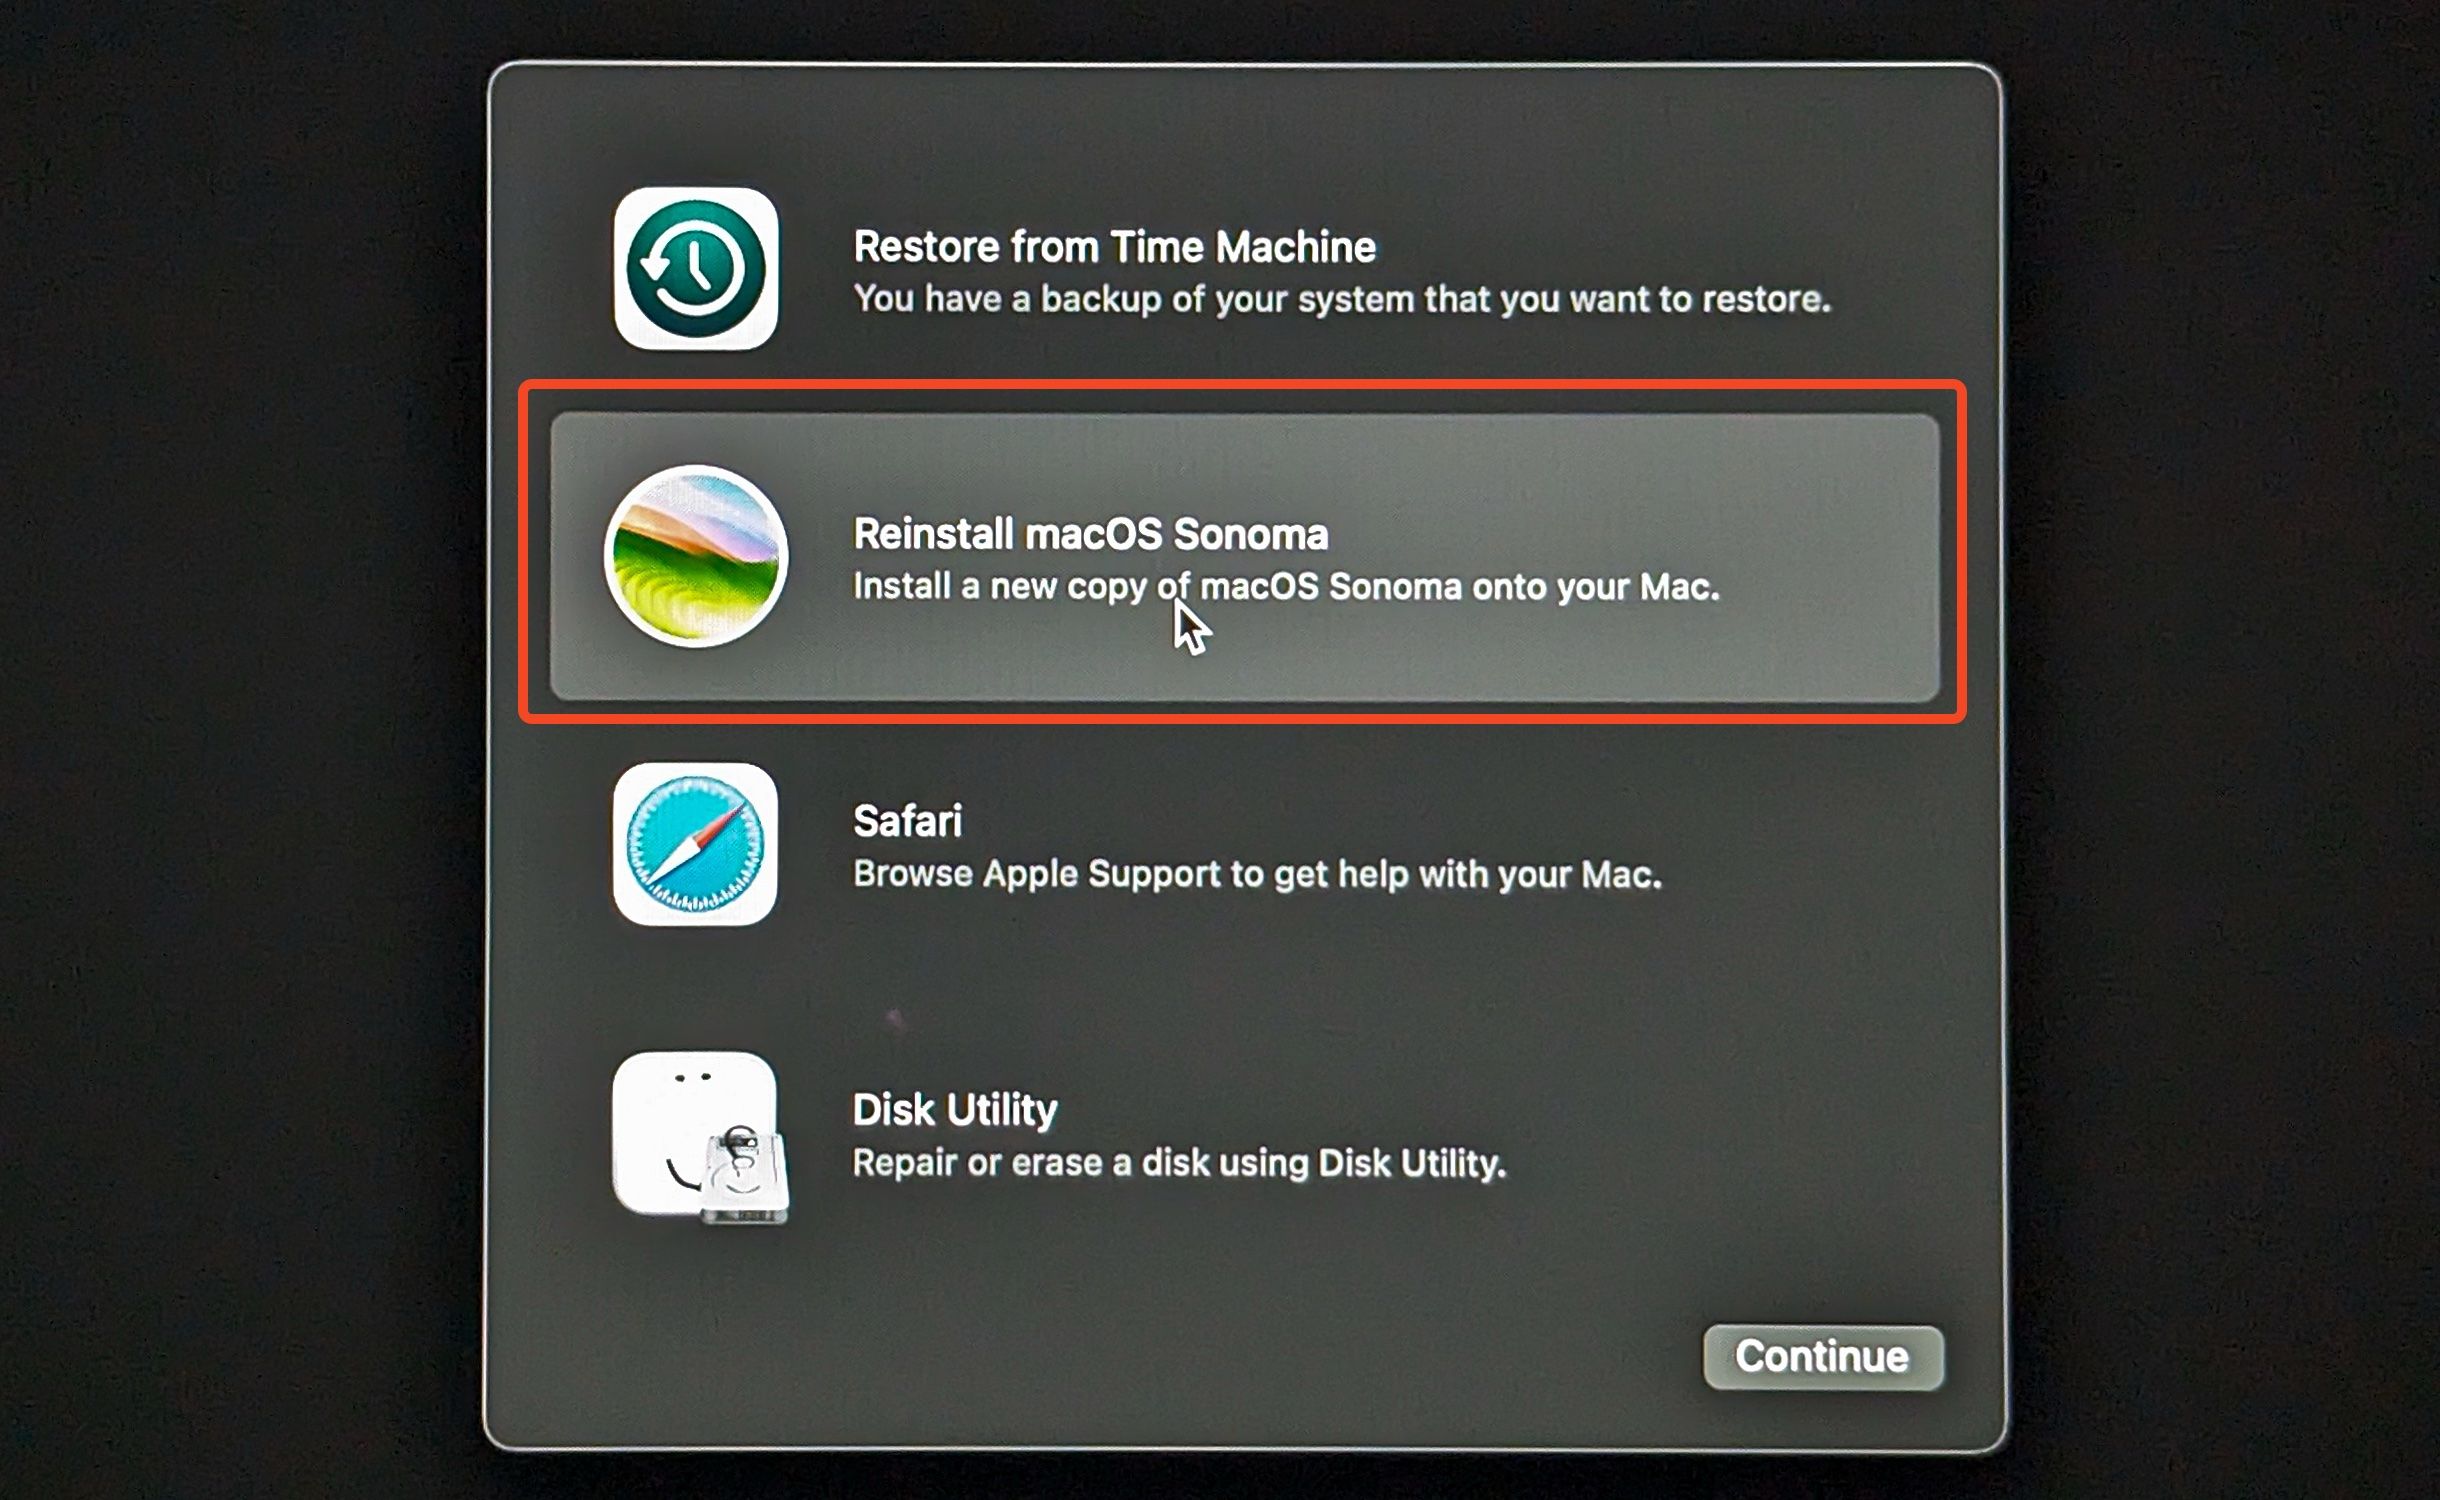
This should get you into Recovery Mode, where you’ll see the macOS Utilities window. Recovery Mode provides four services. You can restore from a Time Machine Backup , get online from the Apple Support site via Safari, try to fix disk problems with Disk Utility, and reinstall macOS.
If your Mac isn’t starting properly, then it’s the last two options that you’ll need to use.
Run First Aid From Your Recovery Partition
The Recovery Partition on all Macs comes loaded with Disk Utility, which can run the First Aid tool on a drive that might have errors, be corrupted, or even be on the brink of failing. First Aid can solve some of these problems and is the best place to start.
If the Disk Utility tells you that your drive is about to fail, take it seriously. We recommend backing up your Mac (if you’re not already doing it) and then looking into getting your Mac serviced. Disk Utility won’t be able to fix a failing disk.
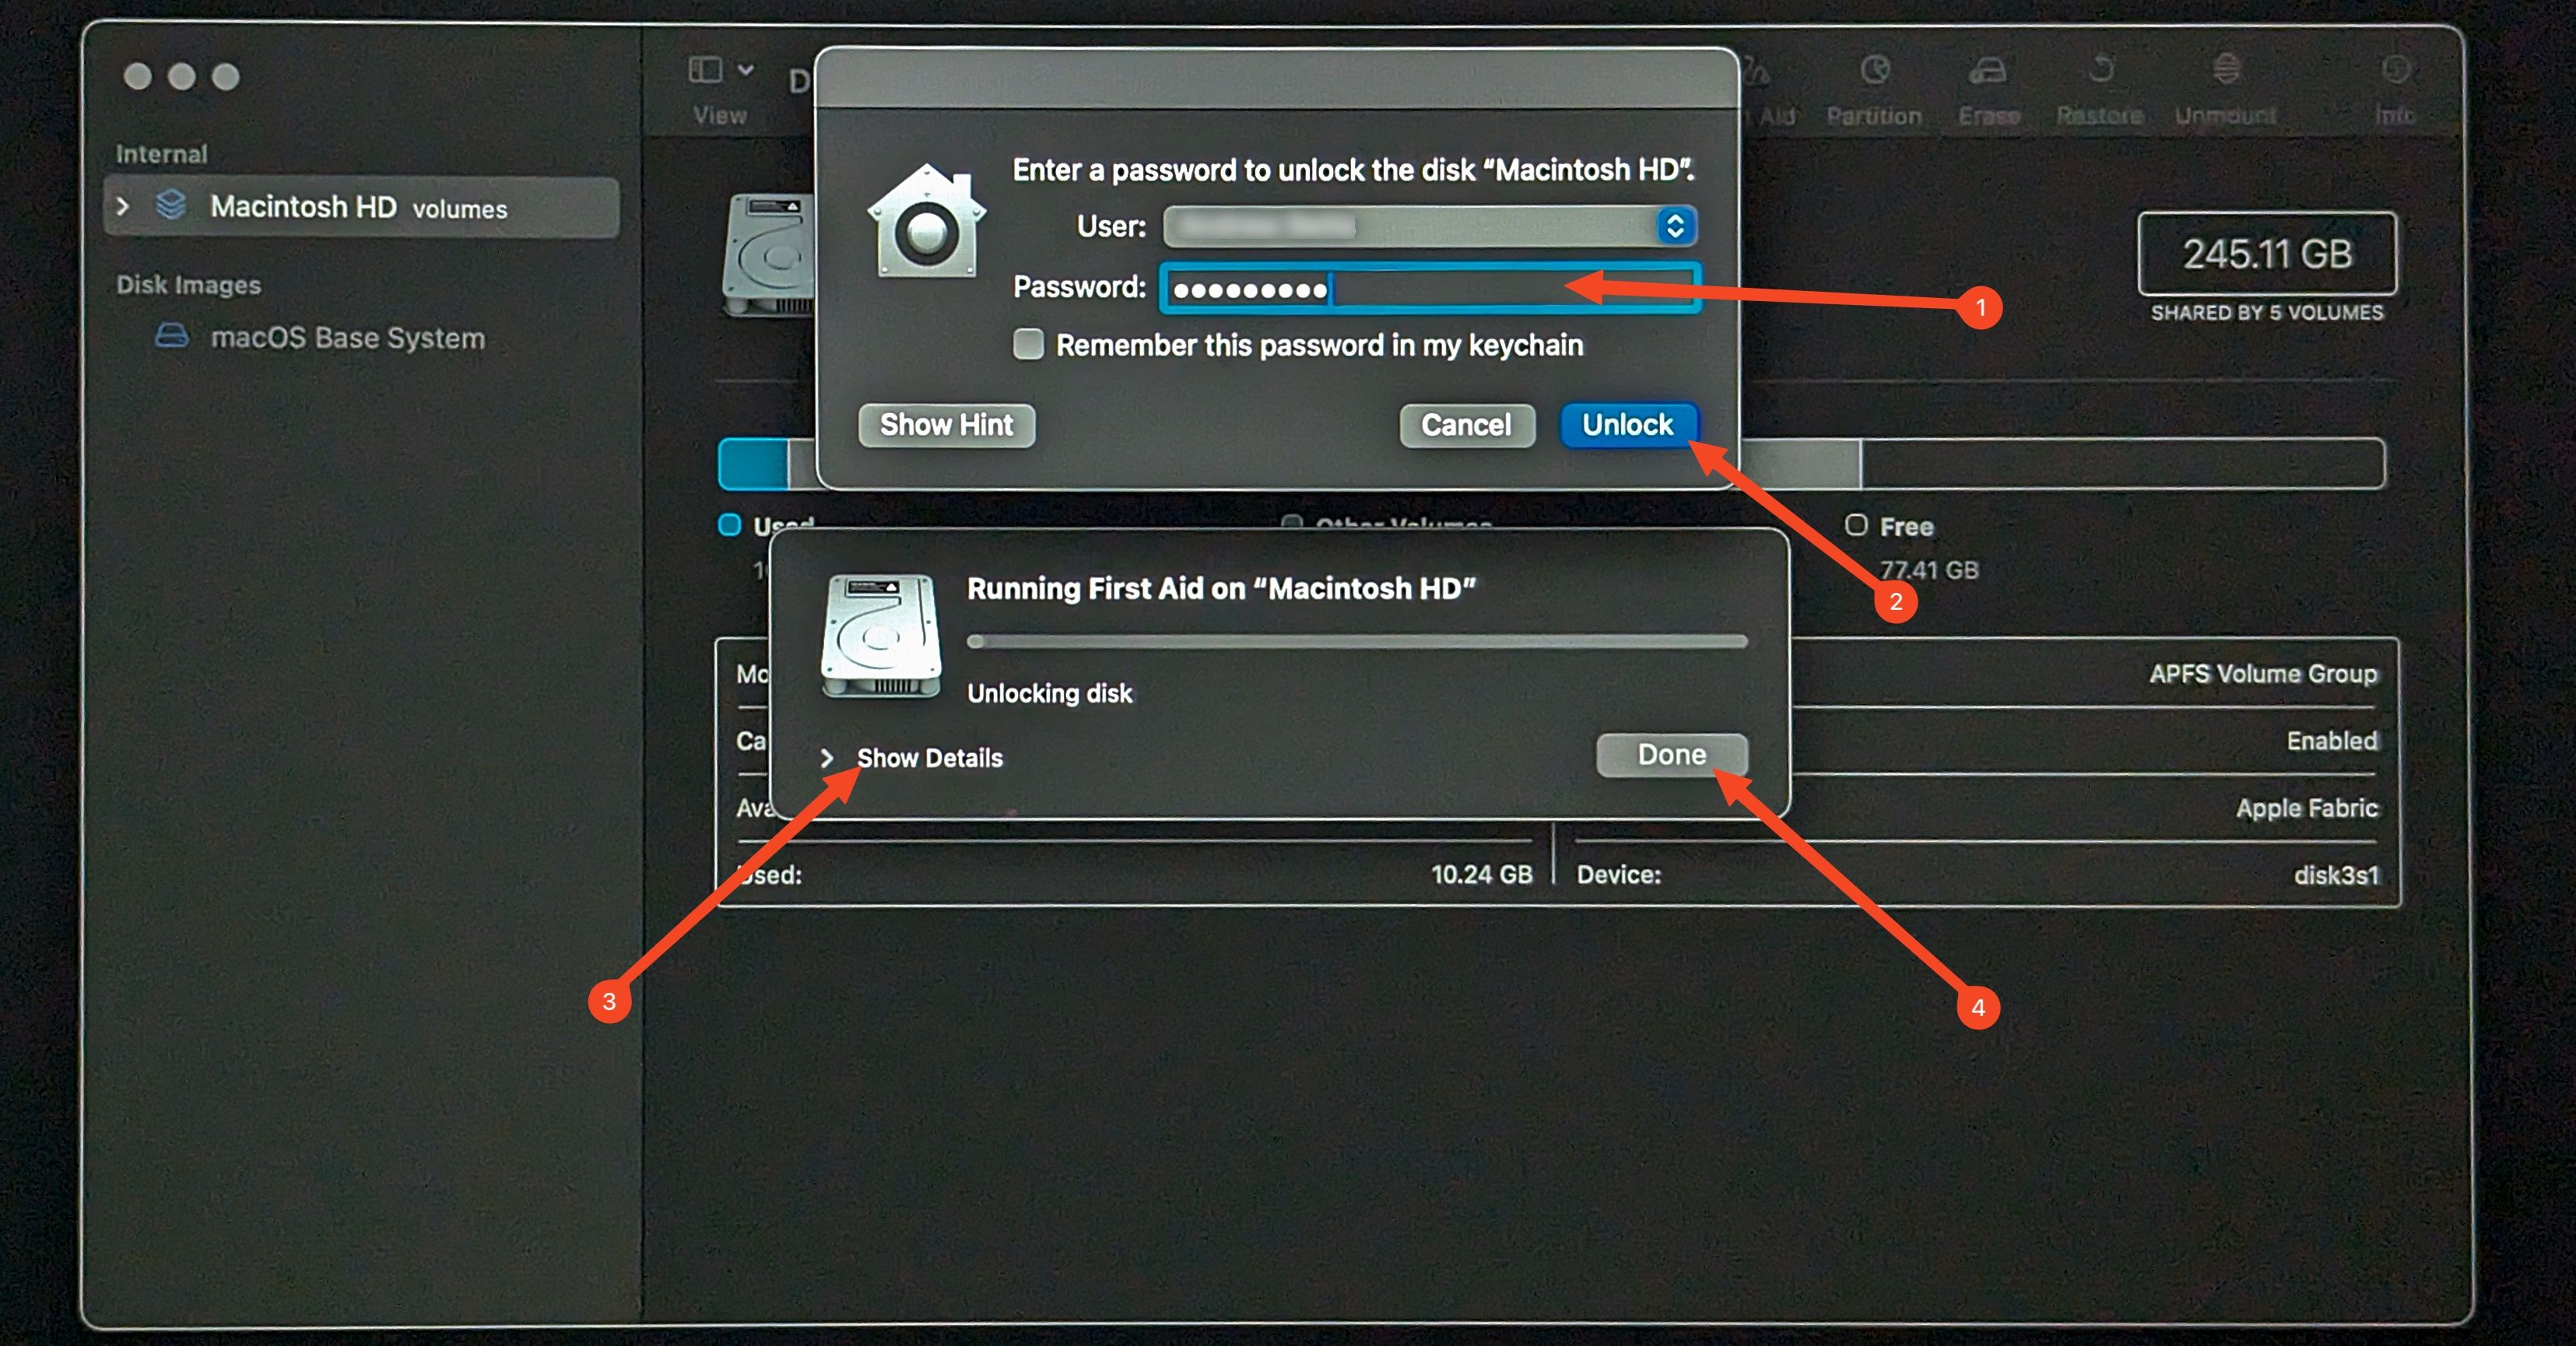
To use it, select “Disk Utility” and hit “Continue.” From the Disk Utility window that opens, select your drive in the left-hand pane. It’ll be listed under “Internal.” Now select “First Aid” from the toolbar, followed by “Run” in the dialog box that opens.
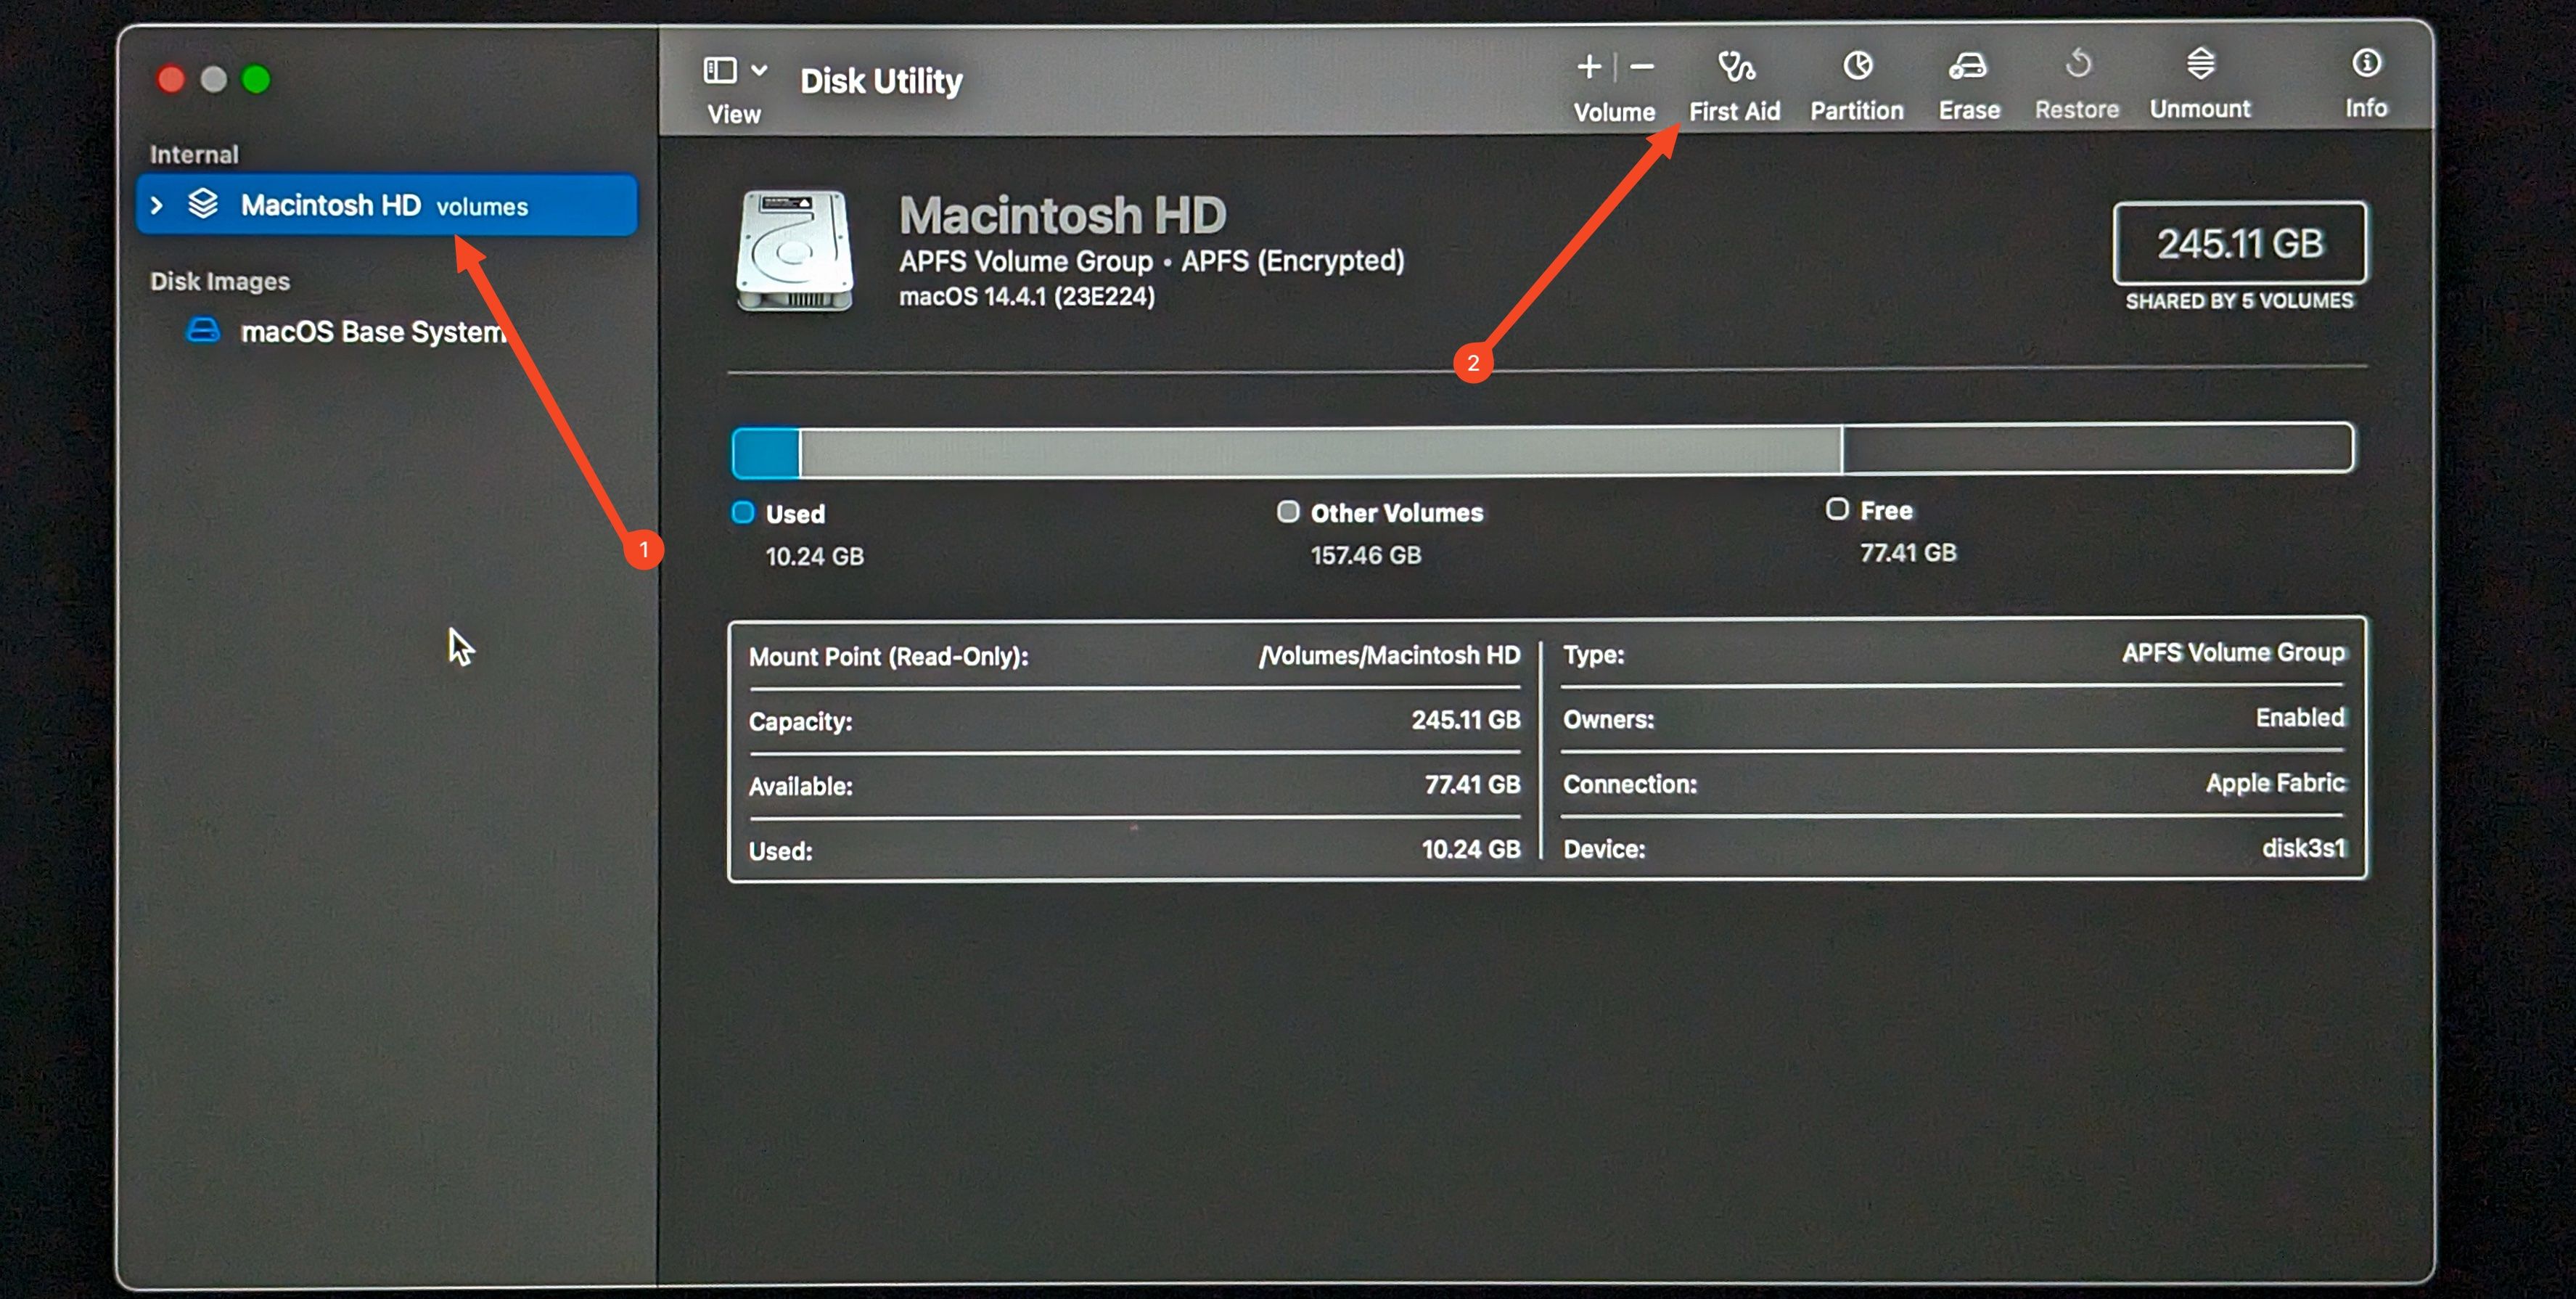
You’ll be prompted to enter the password for your Mac to unlock the drive and run the tool. Click “Unlock” to start repairing your Mac’s drive.
First Aid will begin running immediately. When it’s finished, you’ll see another dialog box opening, hopefully showing a green check mark inside it. You can see info about the status of your drive by clicking “Show Details.” Otherwise, select “Done” to finish the process.
Now try booting into macOS again, which you can do via the Apple icon in the menu bar at the top left of the screen.
If Disk Utility wasn’t able to fix all your problems, you could try running it again. It can sometimes take more than one go to repair everything.
However, if Disk Utility reports that it can’t fix some errors, it’s probably a good time to make sure you’ve got everything backed up and start taking precautions. If your Mac is still reasonably new and otherwise working well, then you could get the drive replaced. Otherwise, it might be time to replace your Mac .
If All Else Fails: Reinstall macOS
Sometimes your Mac won’t boot, not because there are problems with the drive, but because there are problems with the operating system itself. Sometimes you just have to start over.
Luckily, you won’t lose your files when reinstalling macOS, as it uses the same process as upgrading. Still, it’s best to make a backup first, which you can do in Disk Utility without loading into macOS.
On the Recovery Mode splash screen, select “Reinstall macOS,” which will bring up the installer.
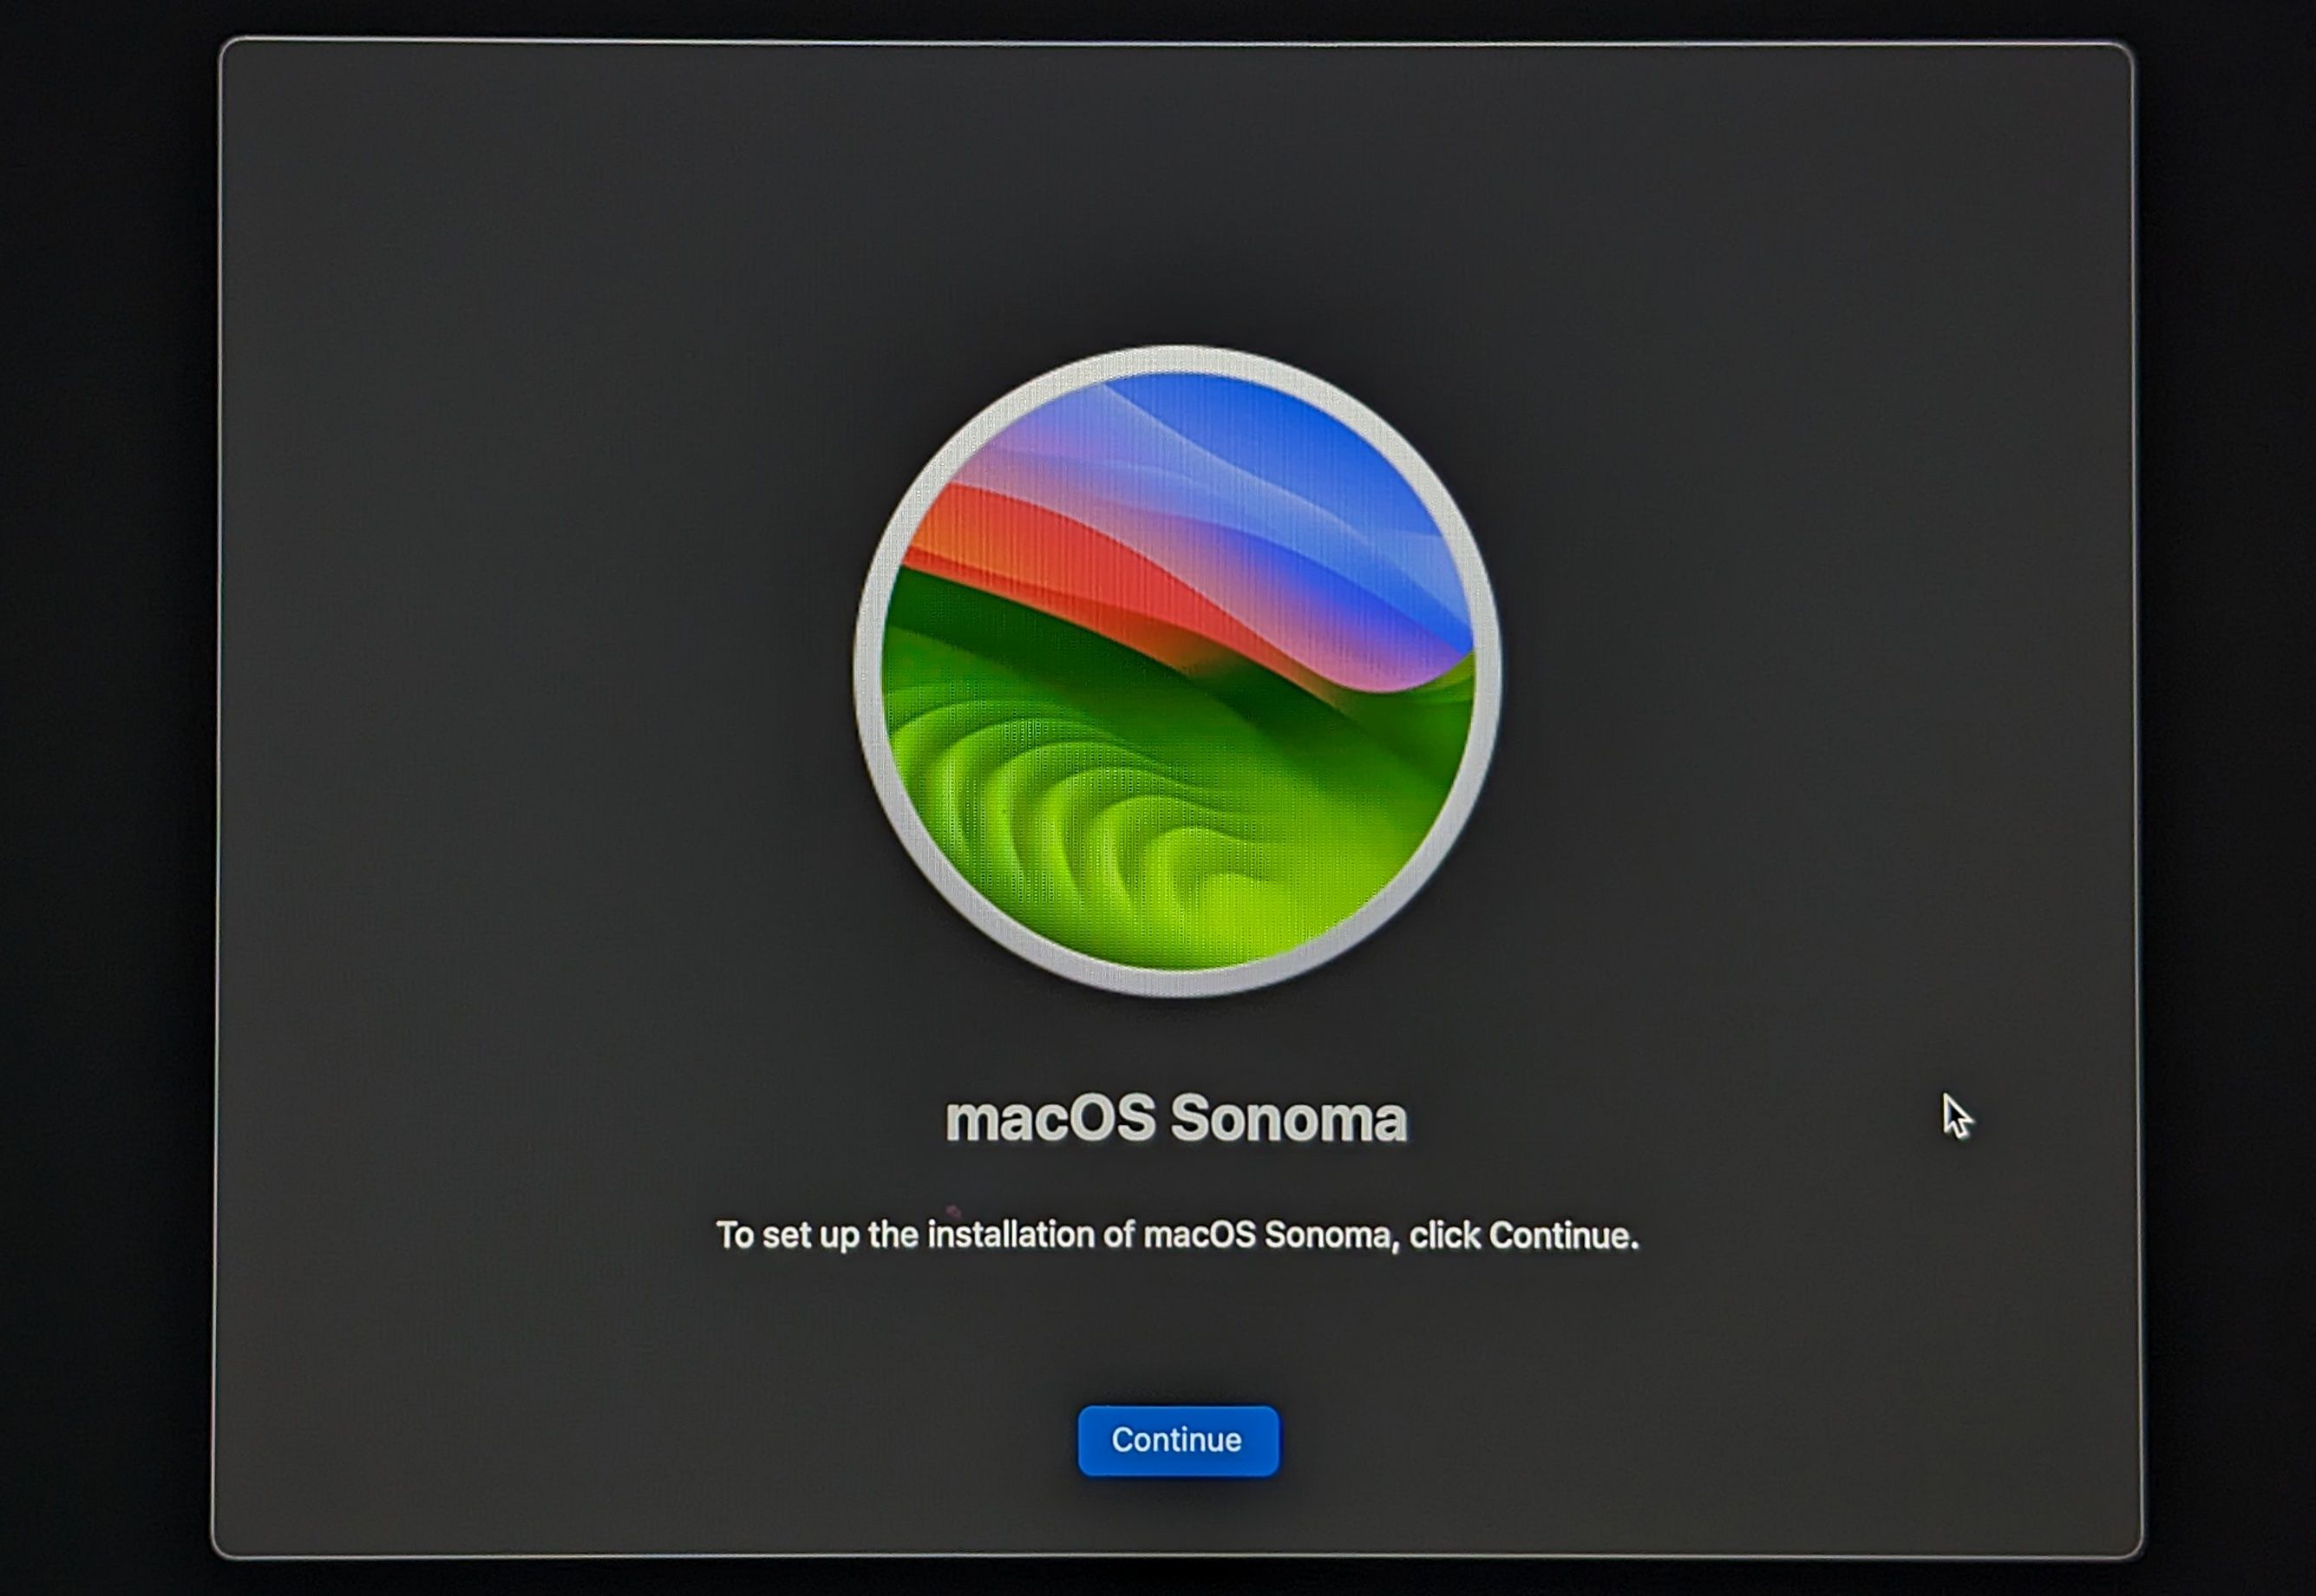
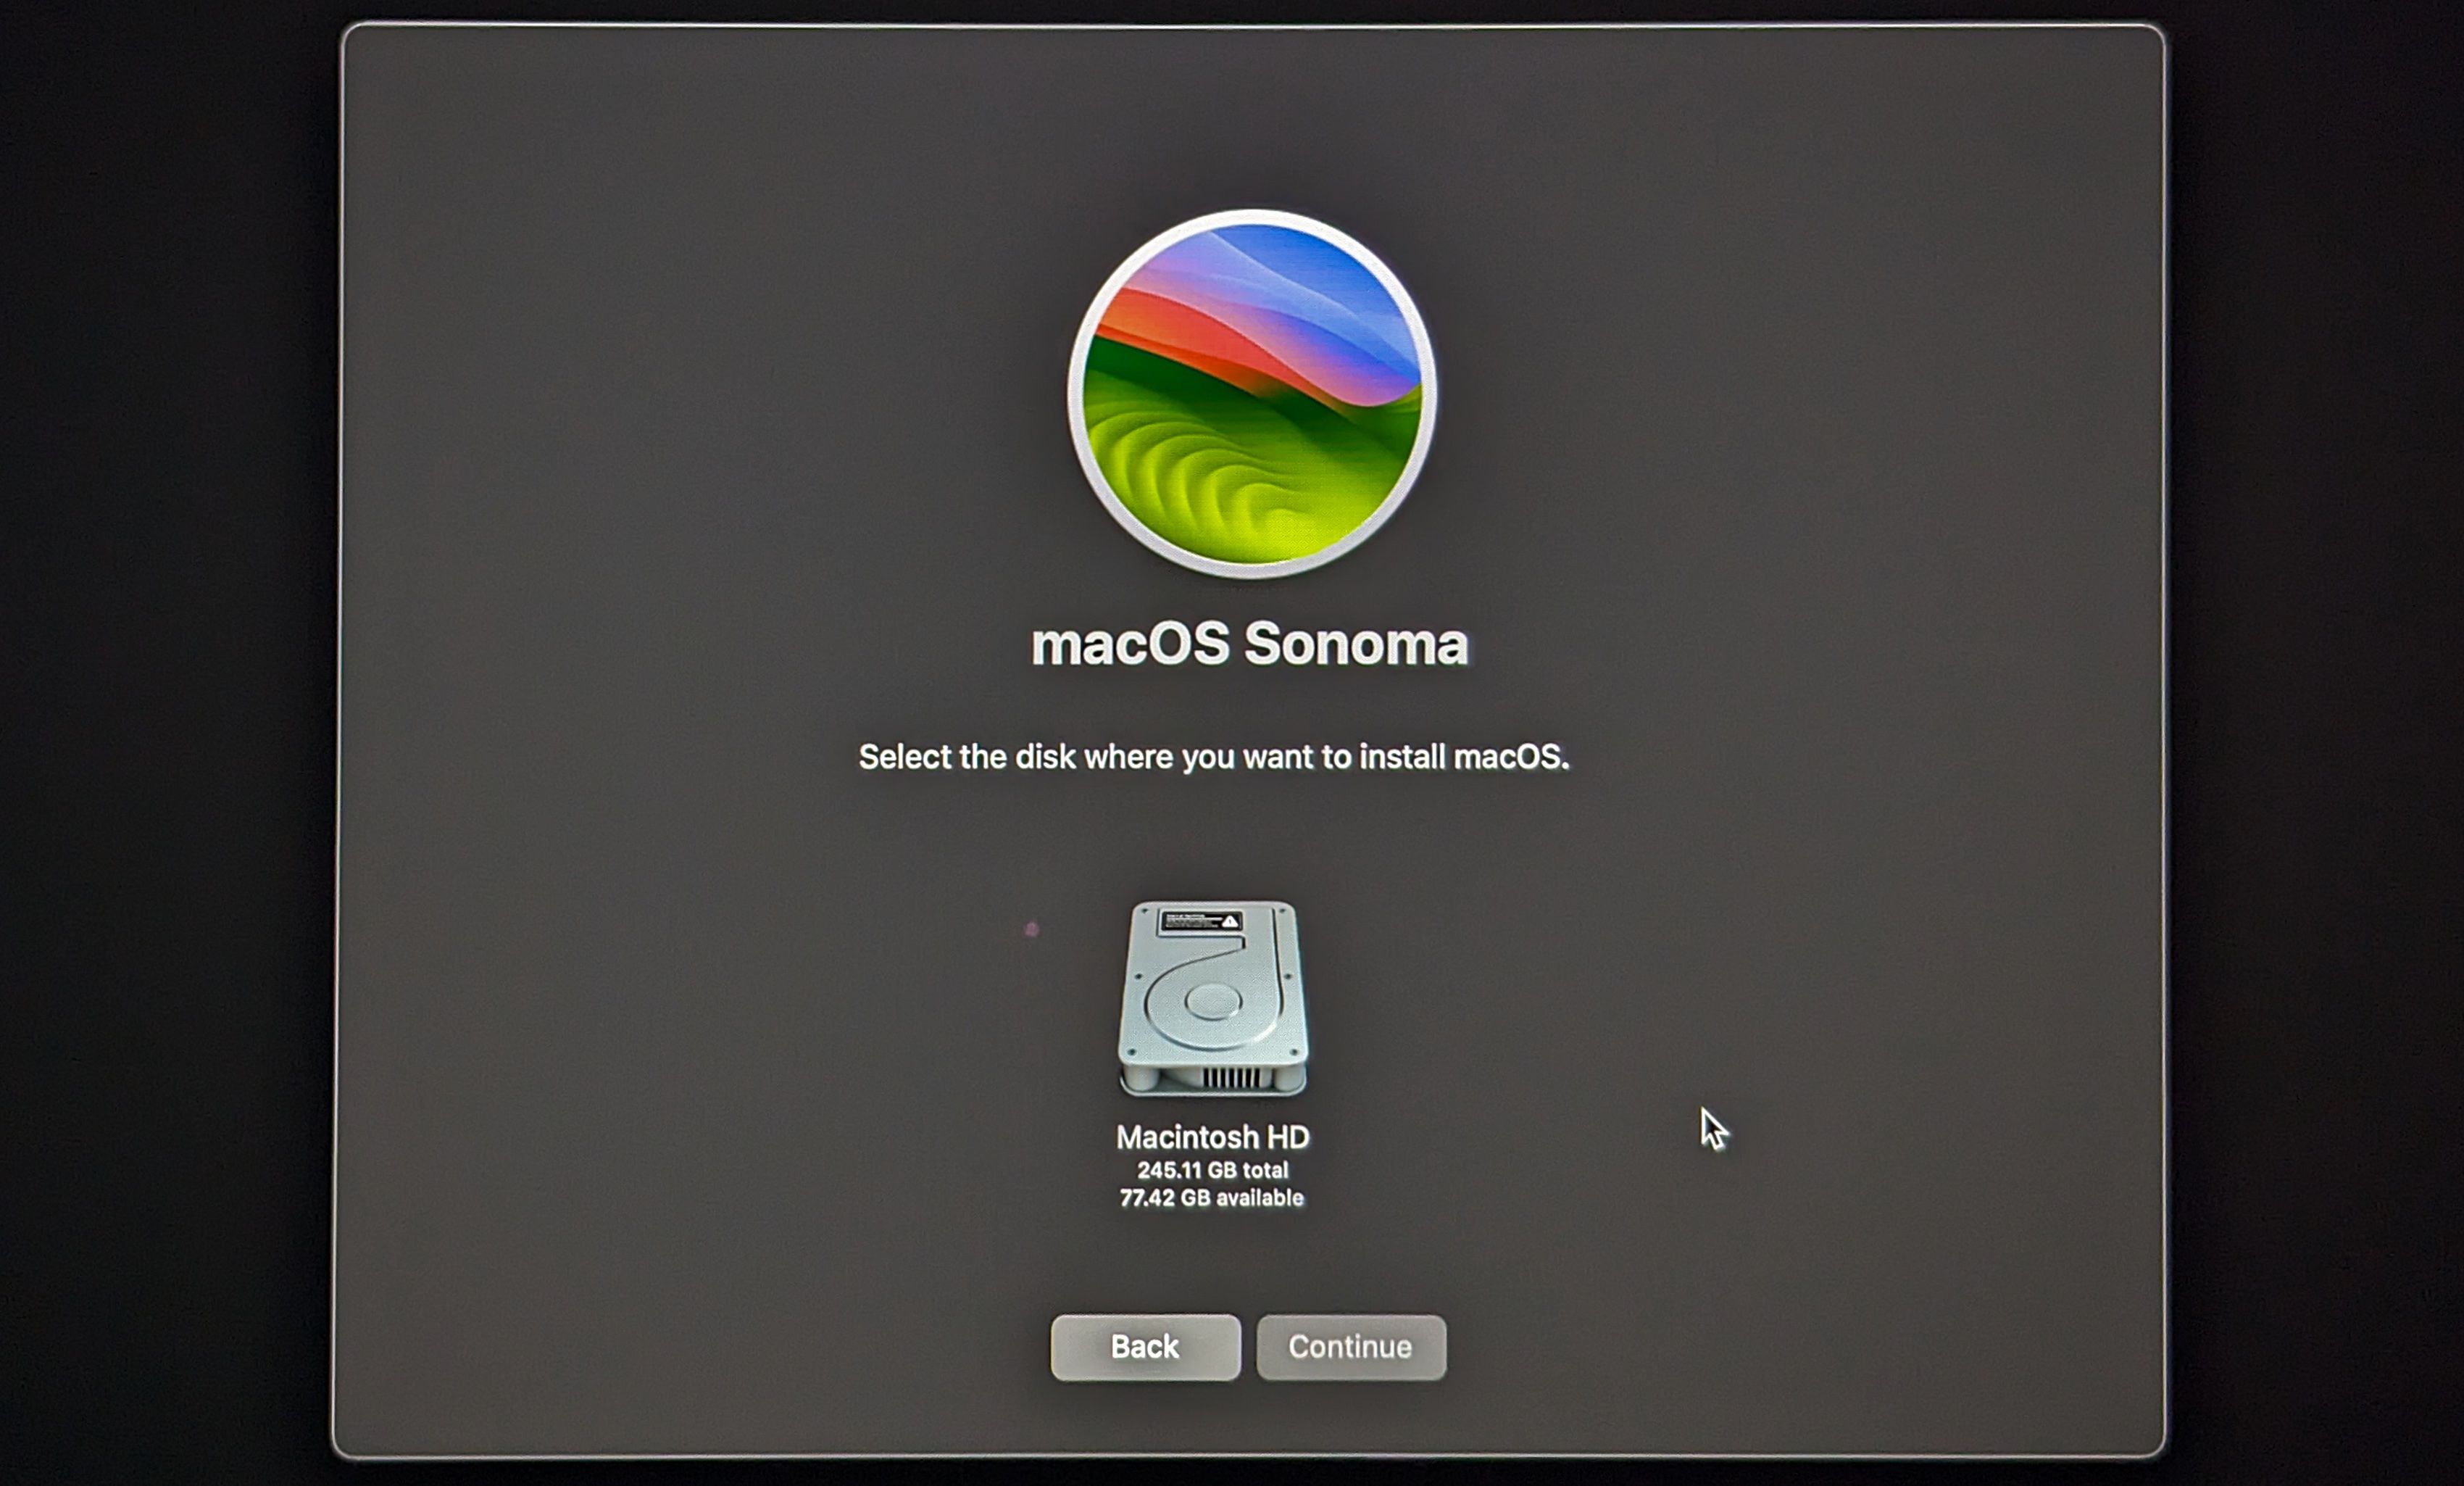
You’ll have to agree to the terms of service and choose the drive to which you want to install. Go ahead and choose your main drive—it may be the only option, anyway.
The installation process will run, and once it’s done, you should boot into a fresh copy of macOS, with your files hopefully still intact.
It is a bit of a worry and can be inconvenient if your Mac won’t start up properly. But that’s why Recovery Mode exists. It enables you to fix many issues you face without needing to send your Mac off for repair. It’s available on all models, whether they’re powered by Intel or Apple Silicon processors, and no matter what version of macOS they’re running.
Also read:
- [New] Immediate Color Correction with Canon's Paired LUTs
- [Updated] 2024 Approved Unveiling the True Income Potential in Podcasting
- [Updated] Blending Realms A Guide to PhotoMosaic Creation for 2024
- Effective Guide: Acquiring and Setting Up the Newest SoundMAX Drivers for Windows Machines
- Expert Insights on Gadgets From Tom's Hardware Hub
- Free Online Conversion: Convert MXF to WMV Using Movavi's Video Editing Tool
- Get the Latest Acer Aspire Amidst 5100 Printer Drivers Here
- In 2024, Dynamic Discussion Drivers in Instagram Social Media Surveys
- In 2024, Mastering Sharp 4K Top 10 Mirrorless Cameras
- In 2024, The Complete Guide to Oppo FRP Bypass Everything You Need to Know
- In-Depth Analysis of New Electronics by Tom's Hardware Experts
- IPhone & iPad Applications Now Pre-Loaded on the Vision Professional App Store - ZDNet Update
- Optimal Record Solution Chromebook Edition for 2024
- Optimized Drivers for Intel's Iris+ Graphics on Your New Windows 11 PC
- Resolving Connectivity Issues with Unrecognized USB Hardware on Windows 10 Systems
- Title: Solve Your Mac's Starting Woes with a Tutorial on Utilizing Recovery Mode for Repairs
- Author: Joseph
- Created at : 2024-10-13 11:21:14
- Updated at : 2024-10-18 22:05:05
- Link: https://hardware-help.techidaily.com/solve-your-macs-starting-woes-with-a-tutorial-on-utilizing-recovery-mode-for-repairs/
- License: This work is licensed under CC BY-NC-SA 4.0.