Control Your Eco-Friendly Smart House with Raspberry Pi - A Step by Step Guide
Control Your Eco-Friendly Smart House with Raspberry Pi - A Step by Step Guide
Key Takeaways
- A Raspberry Pi smart home setup that uses Home Assistant is cost-effective, easy to hide, and energy-efficient.
- Installing Home Assistant on your Pi is effortless using the Raspberry Pi Imager tool, and setup is easy to follow..
- Connect and automate smart devices from different ecosystems with Home Assistant to enjoy a seamless smart home experience.
The Raspberry Pi is a versatile device, but its potential in smart home automation isn’t always clear. In my home, I use a Raspberry Pi to manage my smart devices with Home Assistant. Here’s how you can do the same to enhance your daily living.
Why I Use a Raspberry Pi for My Smart Home
The rise of Internet-enabled devices has started a new era for smart homes, making it easy for our devices to talk to each other and us, simplifying our daily routines. Out of all the options out there, I decided to go with a Raspberry Pi to run my smart home.
The main reason that I chose a Raspberry Pi for my Home Assistant setup is its low cost and versatility. For around $35—or a bit more with a starter kit—you can set up something that rivals more expensive home servers with a bit of time and effort.
The Raspberry Pi Foundation
One big plus with the Raspberry Pi is how easy it is to set up. Even though there’s some work involved on your part, it’s straightforward to get up and running. The whole setup process, including connecting it to the internet, is so simple that you don’t need to be a computer expert to get started. Plus, there’s a huge community of Raspberry Pi users and developers out there who share easy-to-follow guides, software, and gear that works well with the Pi. This means that finding help and resources when you need them is a breeze.
The Raspberry Pi’s small size and low power use are also big advantages for building smart homes. You can easily hide your Pi in a corner or mount it on a wall to keep it out of sight. And since it’s super energy-efficient, you don’t have to worry about it generating too much additional heat or running up your electric bill.

First, Get Yourself a Raspberry Pi
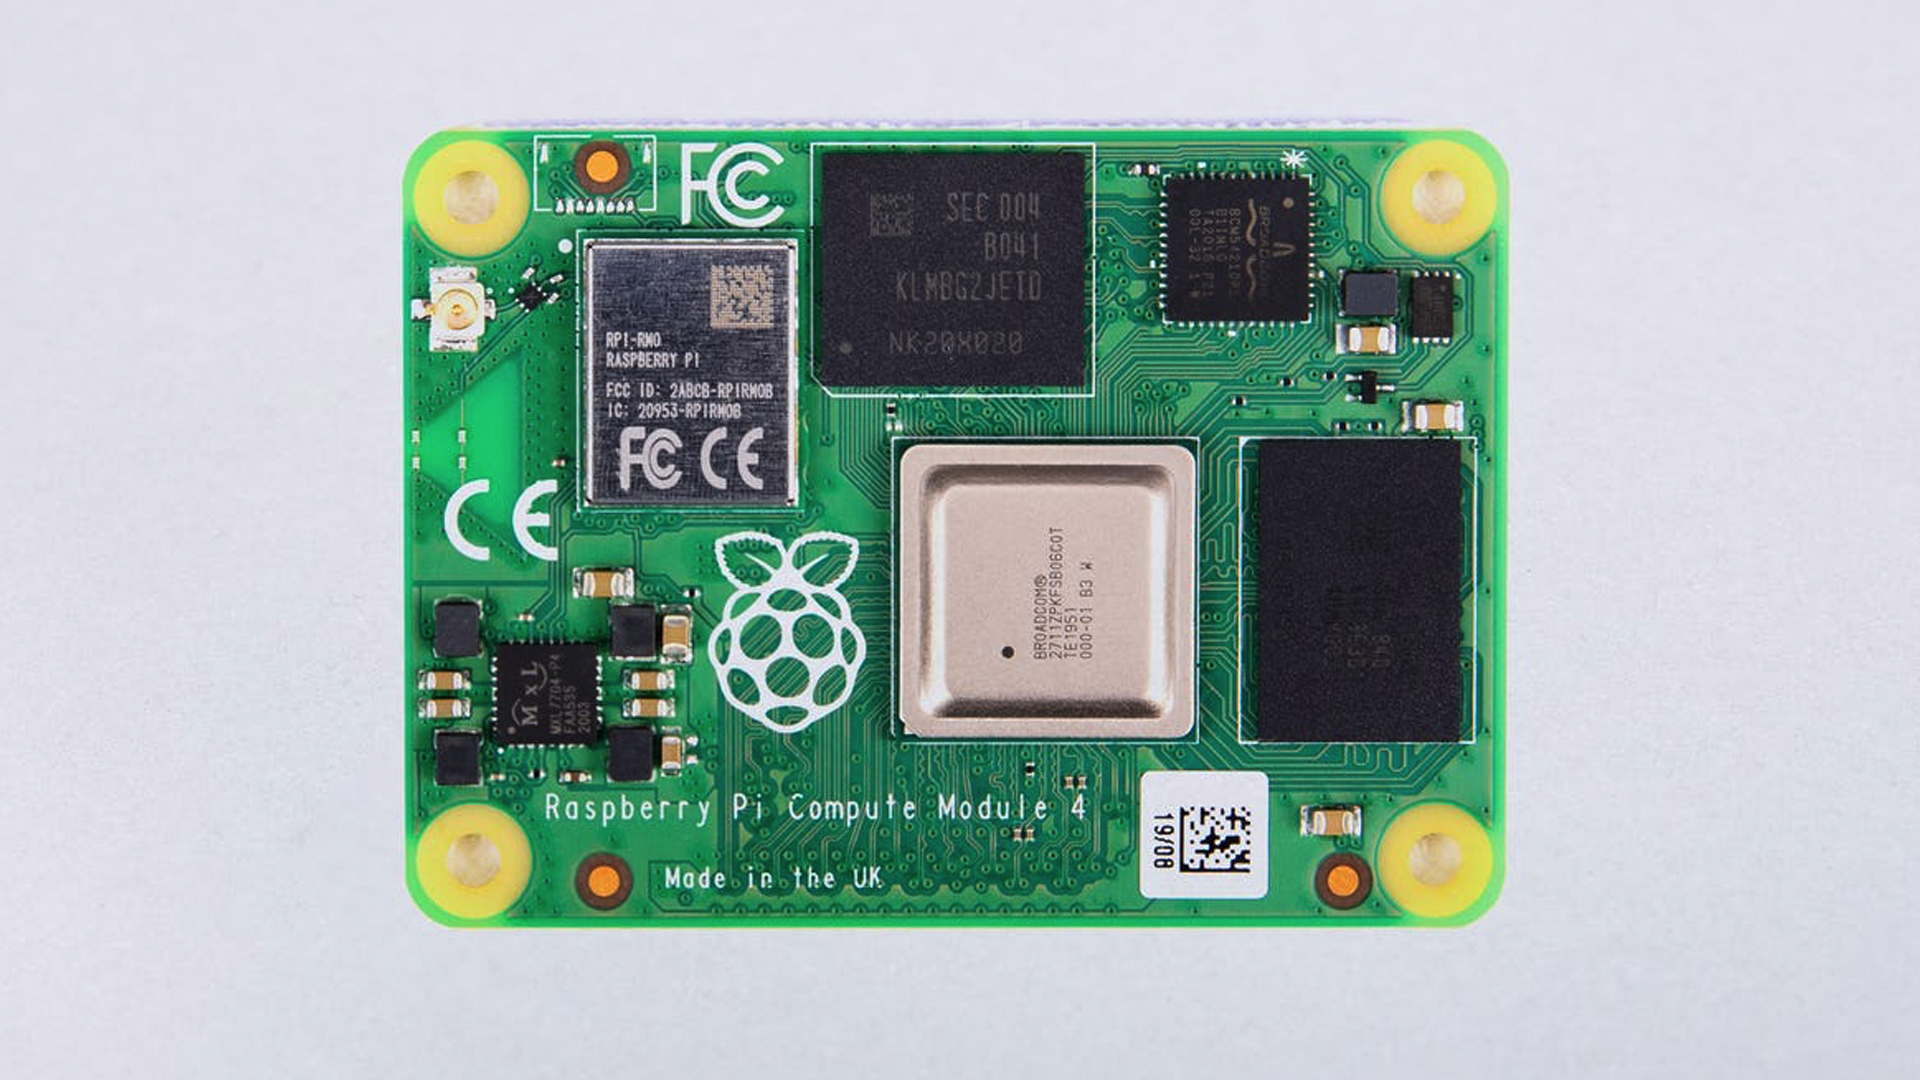
Starting your smart home journey begins with picking up a Raspberry Pi . This small, affordable microcomputer is perfect for running Home Assistant, an open-source home automation platform. To get going, you’ll need either a Raspberry Pi 3, Raspberry Pi 4/400, or Raspberry Pi 5, all of which are available at most online retailers. Check out our best Raspberry Pi kits for more ideas .
Before you start setting up your Raspberry Pi, make sure you have all the necessary components. This includes the Raspberry Pi itself, a MicroSD card to store the operating system and other files, and a power supply. It’s also smart to get a case to protect your Pi, along with any cables or adapters you might need.
Install and Configure Home Assistant
Home Assistant is the open-source software that powers my Raspberry Pi smart home setup, and it’s surprisingly easy to use. The platform boasts nearly 3000 integrations, with more added all the time. It’s a great way to bring together a variety of connected devices from different smart home ecosystems, all under a single control point.
Once you’ve obtained your Raspberry Pi, the next step is to set up Home Assistant using the Raspberry Pi Imager tool. First, download the imager tool from the “Software” section at RaspberryPi.com , available for Windows, macOS, and Linux.
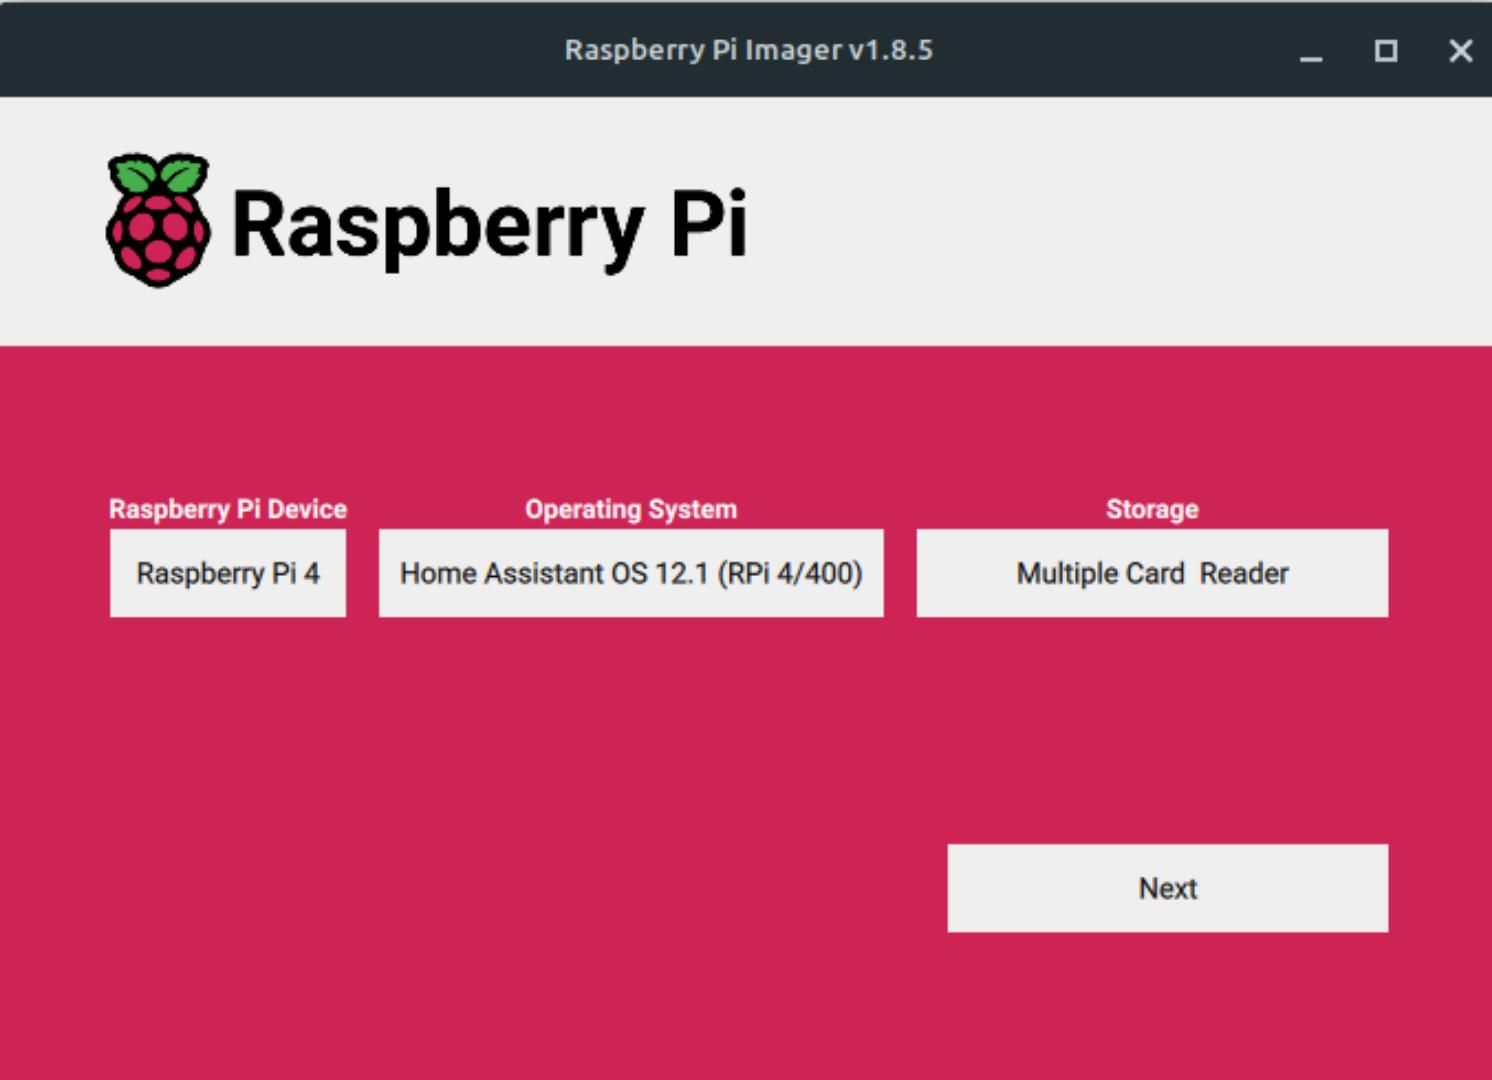
After installing the tool, open it and insert your Raspberry Pi’s MicroSD card into your computer. Use the “Choose Device” button to select your Pi model, then click on “Choose OS.” Navigate to “Other specific-purpose OS,” select “Home assistants and home automation,” and choose “Home Assistant.”
Select “Home Assistant OS 12.1” appropriate for your Pi model, click “Choose Storage” to select your MicroSD card, and hit “Next” to start the installation.
Once installed, unplug the MicroSD card from your computer, insert it into the Pi, and turn it on. Connect it to a monitor and, if possible, plug in an Ethernet cable for network connectivity.
When the Pi is on, open a browser and navigate to the Home Assistant URL shown on the screen. If the URL doesn’t work, try:
http://IPv4_ADDRESS_ON_SCREEN:8123
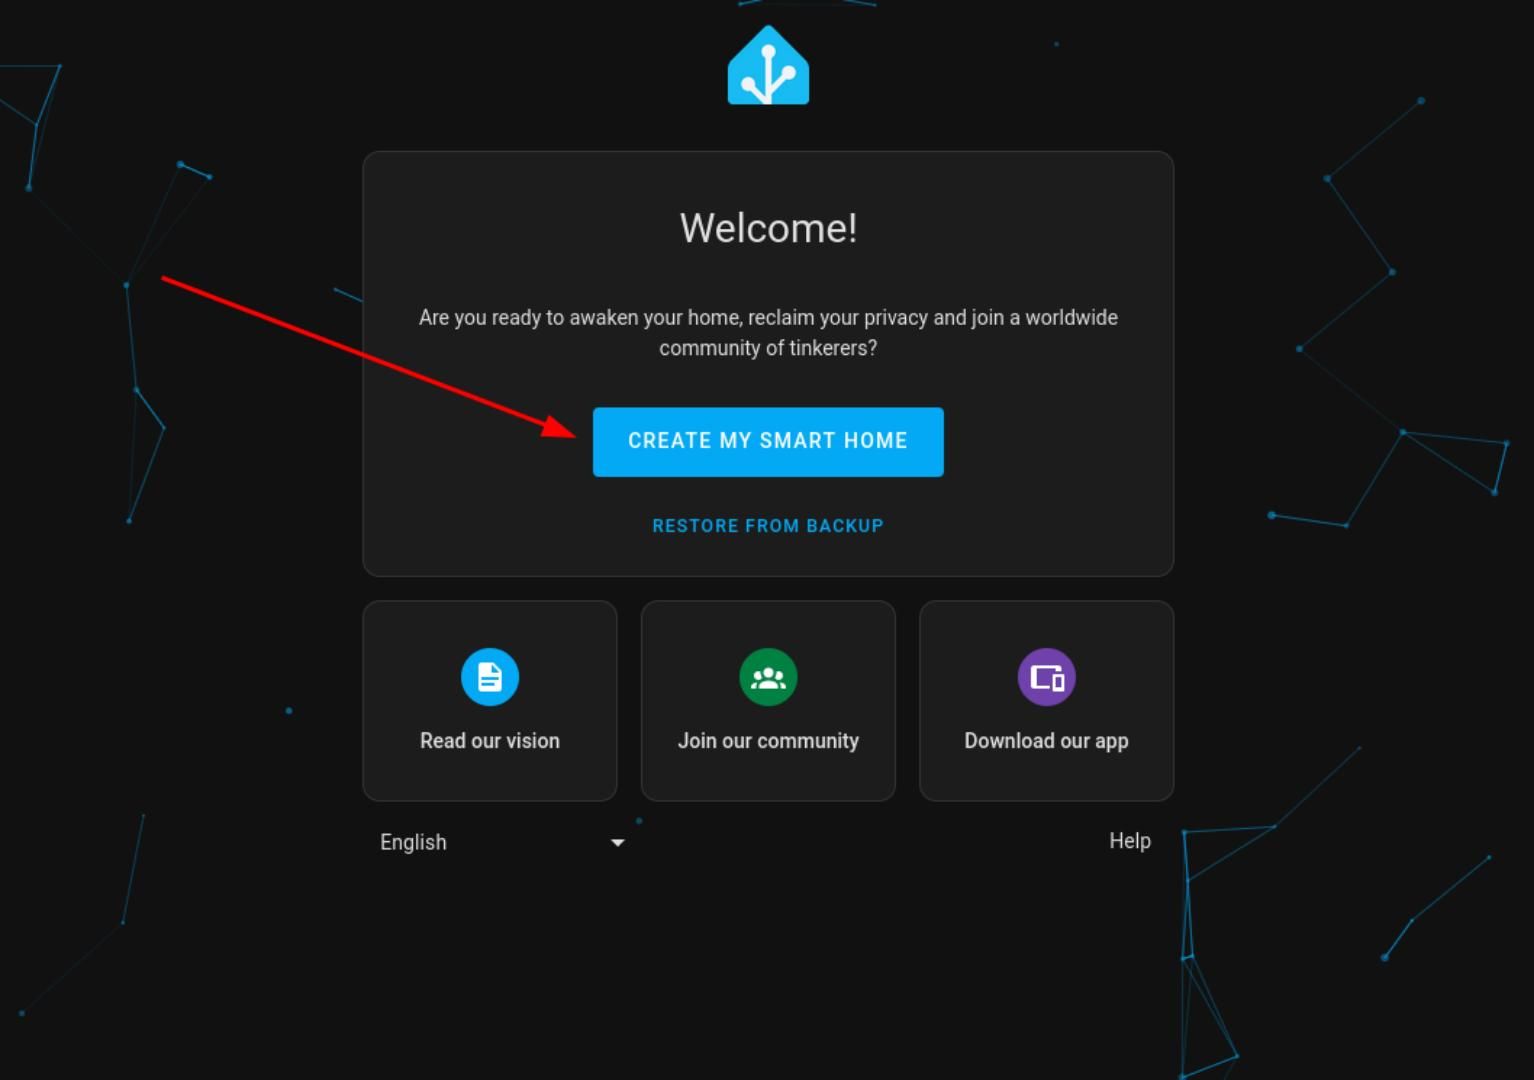
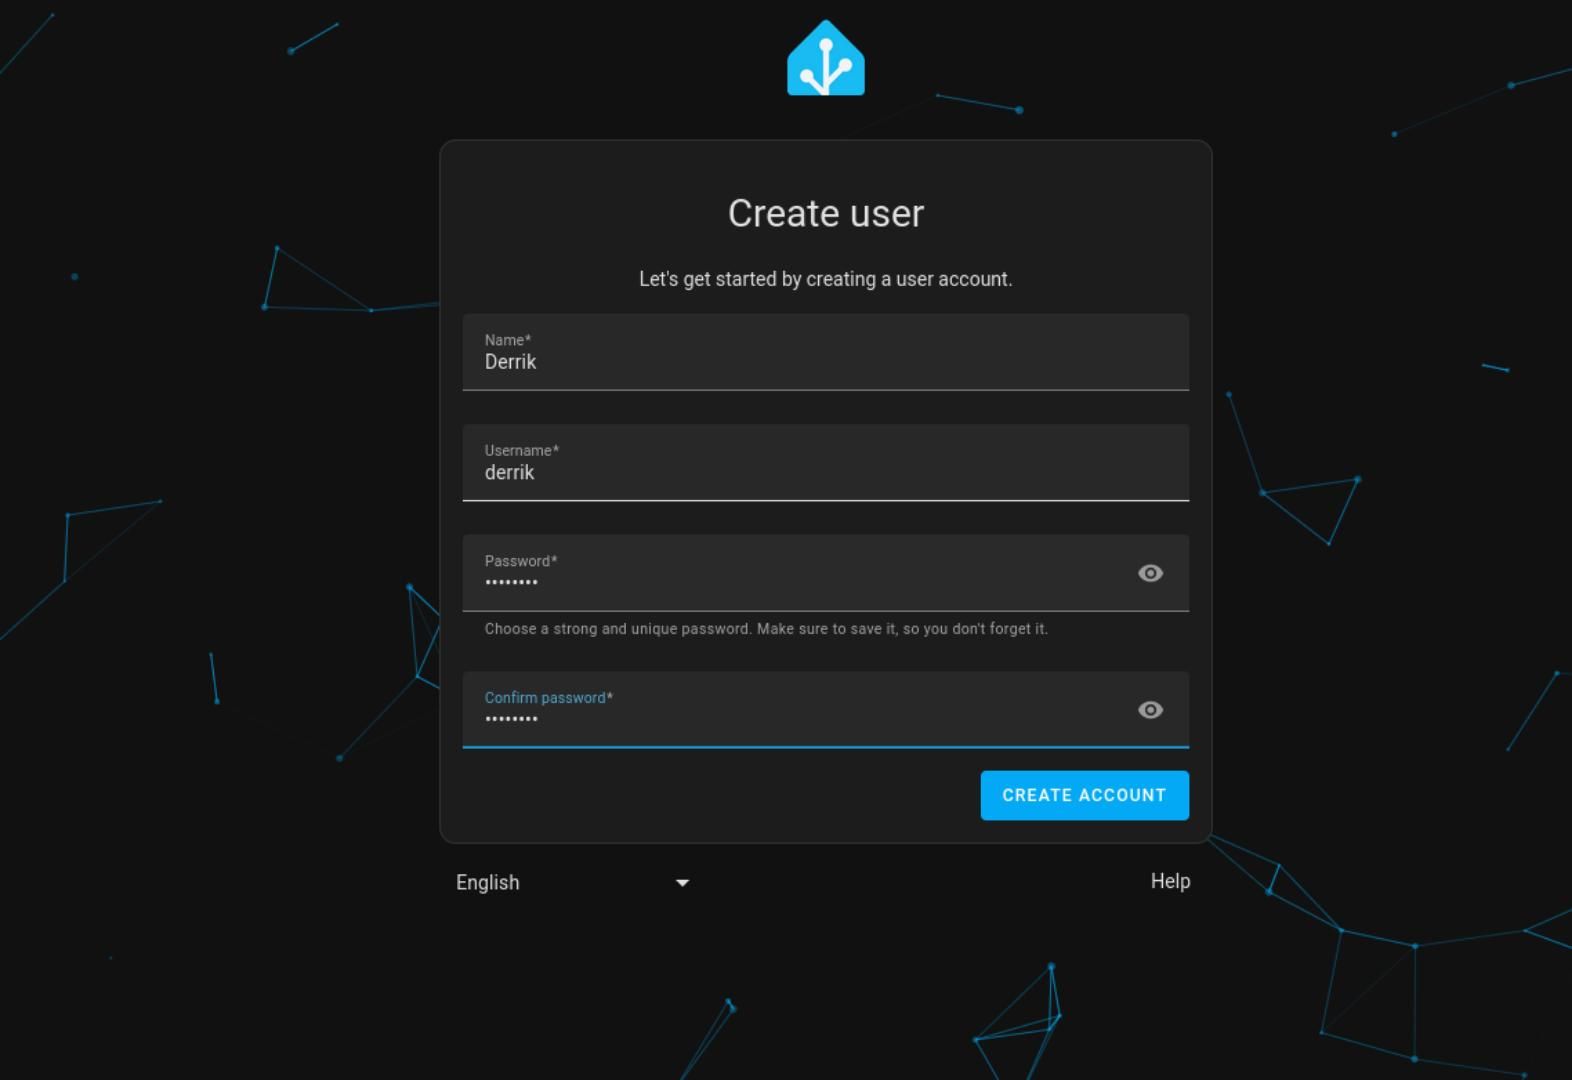
On the welcome screen, click “Create my smart home,” then create a user by entering your name, username, and password.
Configure your home address and country through the Home Assistant UI. The dashboard will then be ready to use.
Connect Your Smart Home Devices
Setting up smart home devices with Home Assistant is quite easy using its automatic discovery tool. Just go to Settings > Devices & Services and click on the “Integrations” tab. Here, Home Assistant will show you devices built for Google Nest , Amazon Alexa , and Apple HomeKit that it finds on your network. You can easily connect these devices with a few clicks.
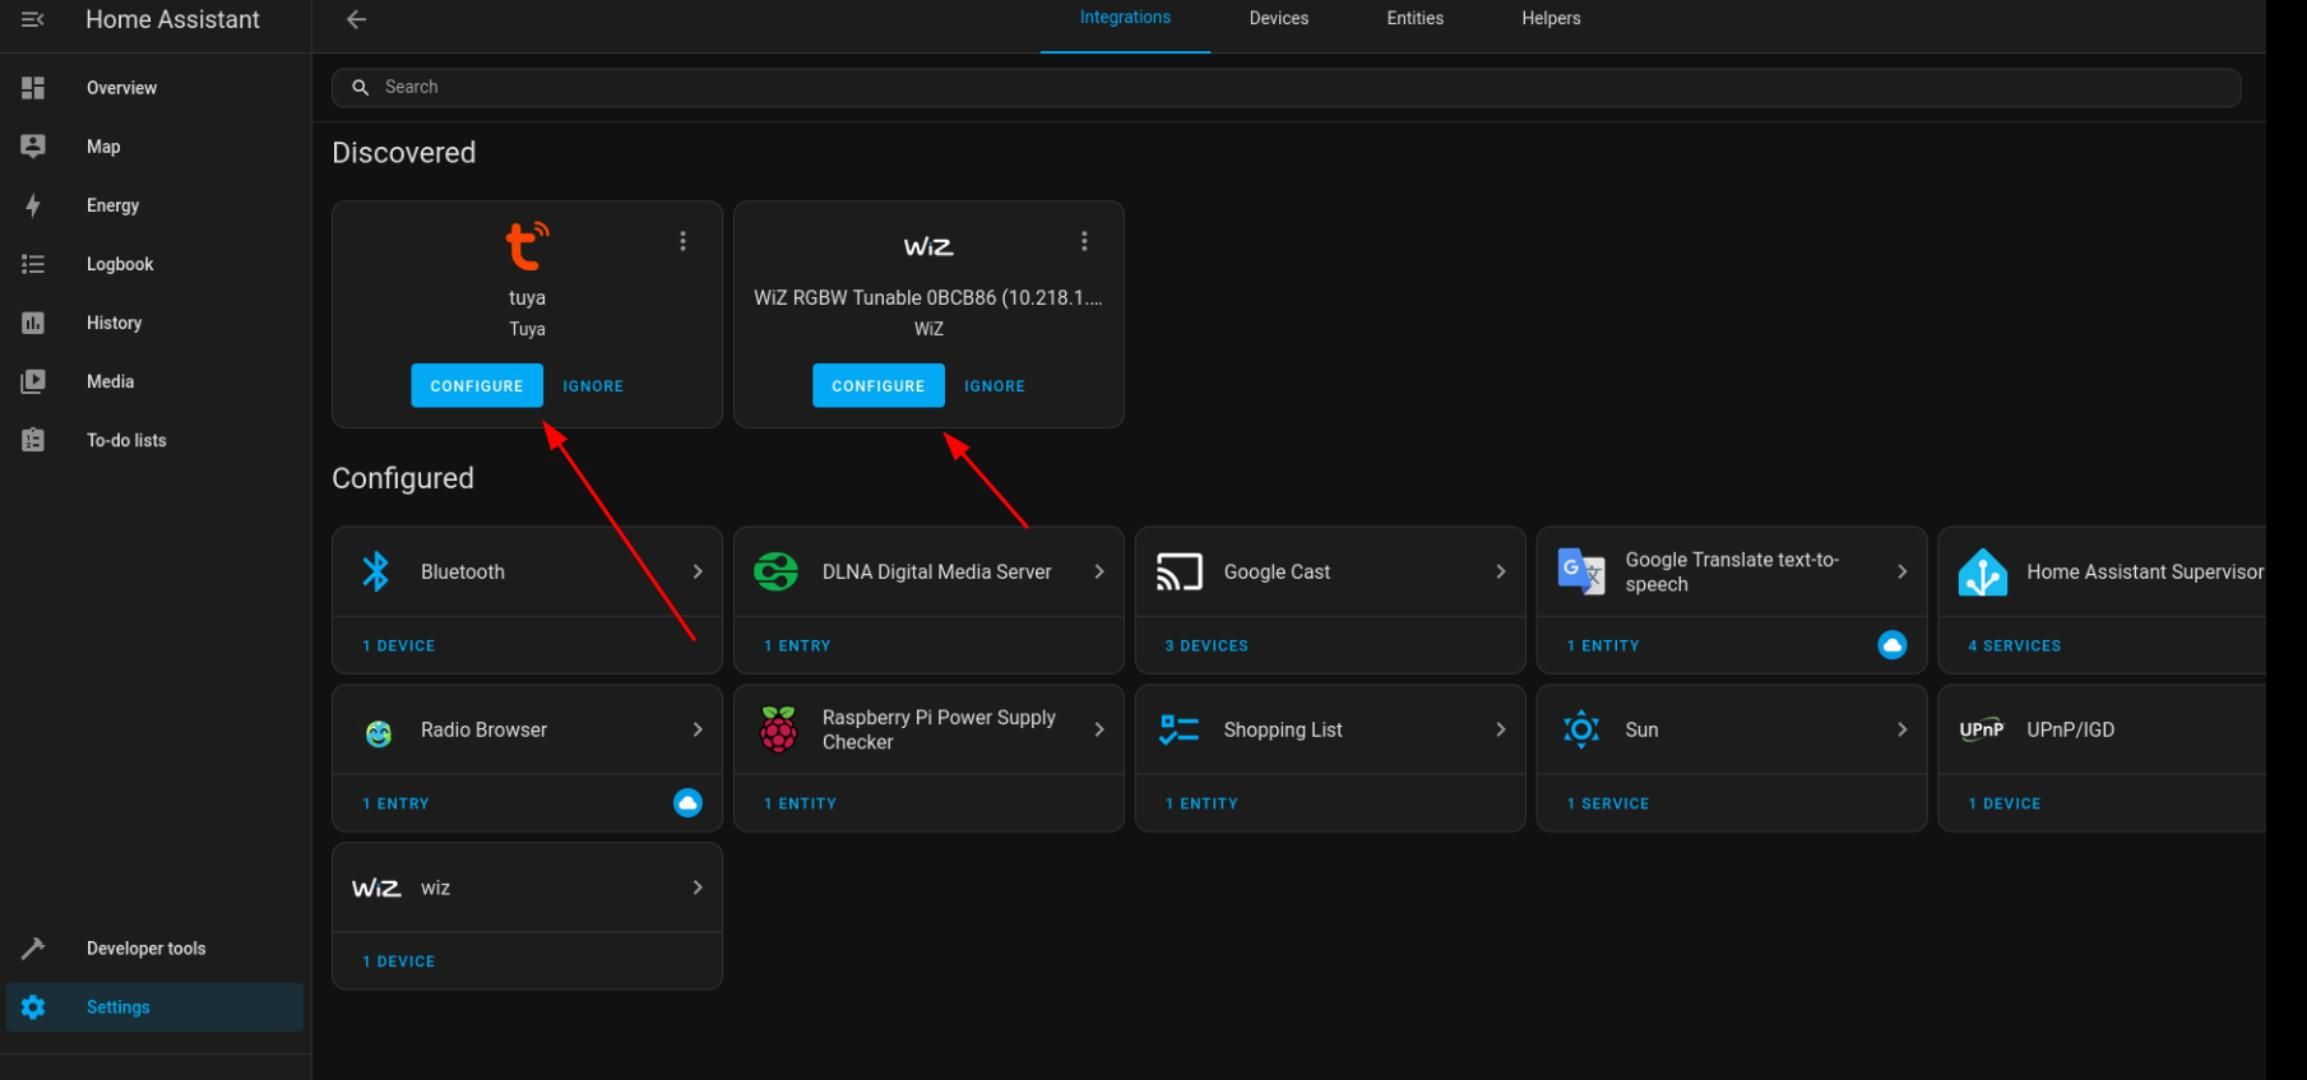
If Home Assistant doesn’t find a device on its own, you can add it manually through “Add Integration” on the Integrations page. This is handy for devices that need specific setup steps or aren’t supported by default discovery methods like zeroconf /mDNS and UPnP .
Keep in mind that devices like Google Chromecast and Belkin WeMo switches usually connect automatically, but others, like Philips Hue , might need a bit more setup. Make sure all of your devices are on the same network as Home Assistant to avoid any connectivity issues, particularly for functions that rely on your local network.
Customize and Automate Home Assistant
Making your smart home work for you involves tailoring Home Assistant to meet your specific needs. Begin by navigating to the Home Assistant dashboard. Head to Settings > Dashboards and you’ll see options to modify an existing dashboard or create a new one by clicking the “Add Dashboard” button. Simply name your new dashboard, select an icon, and start adding cards to manage and control your devices.
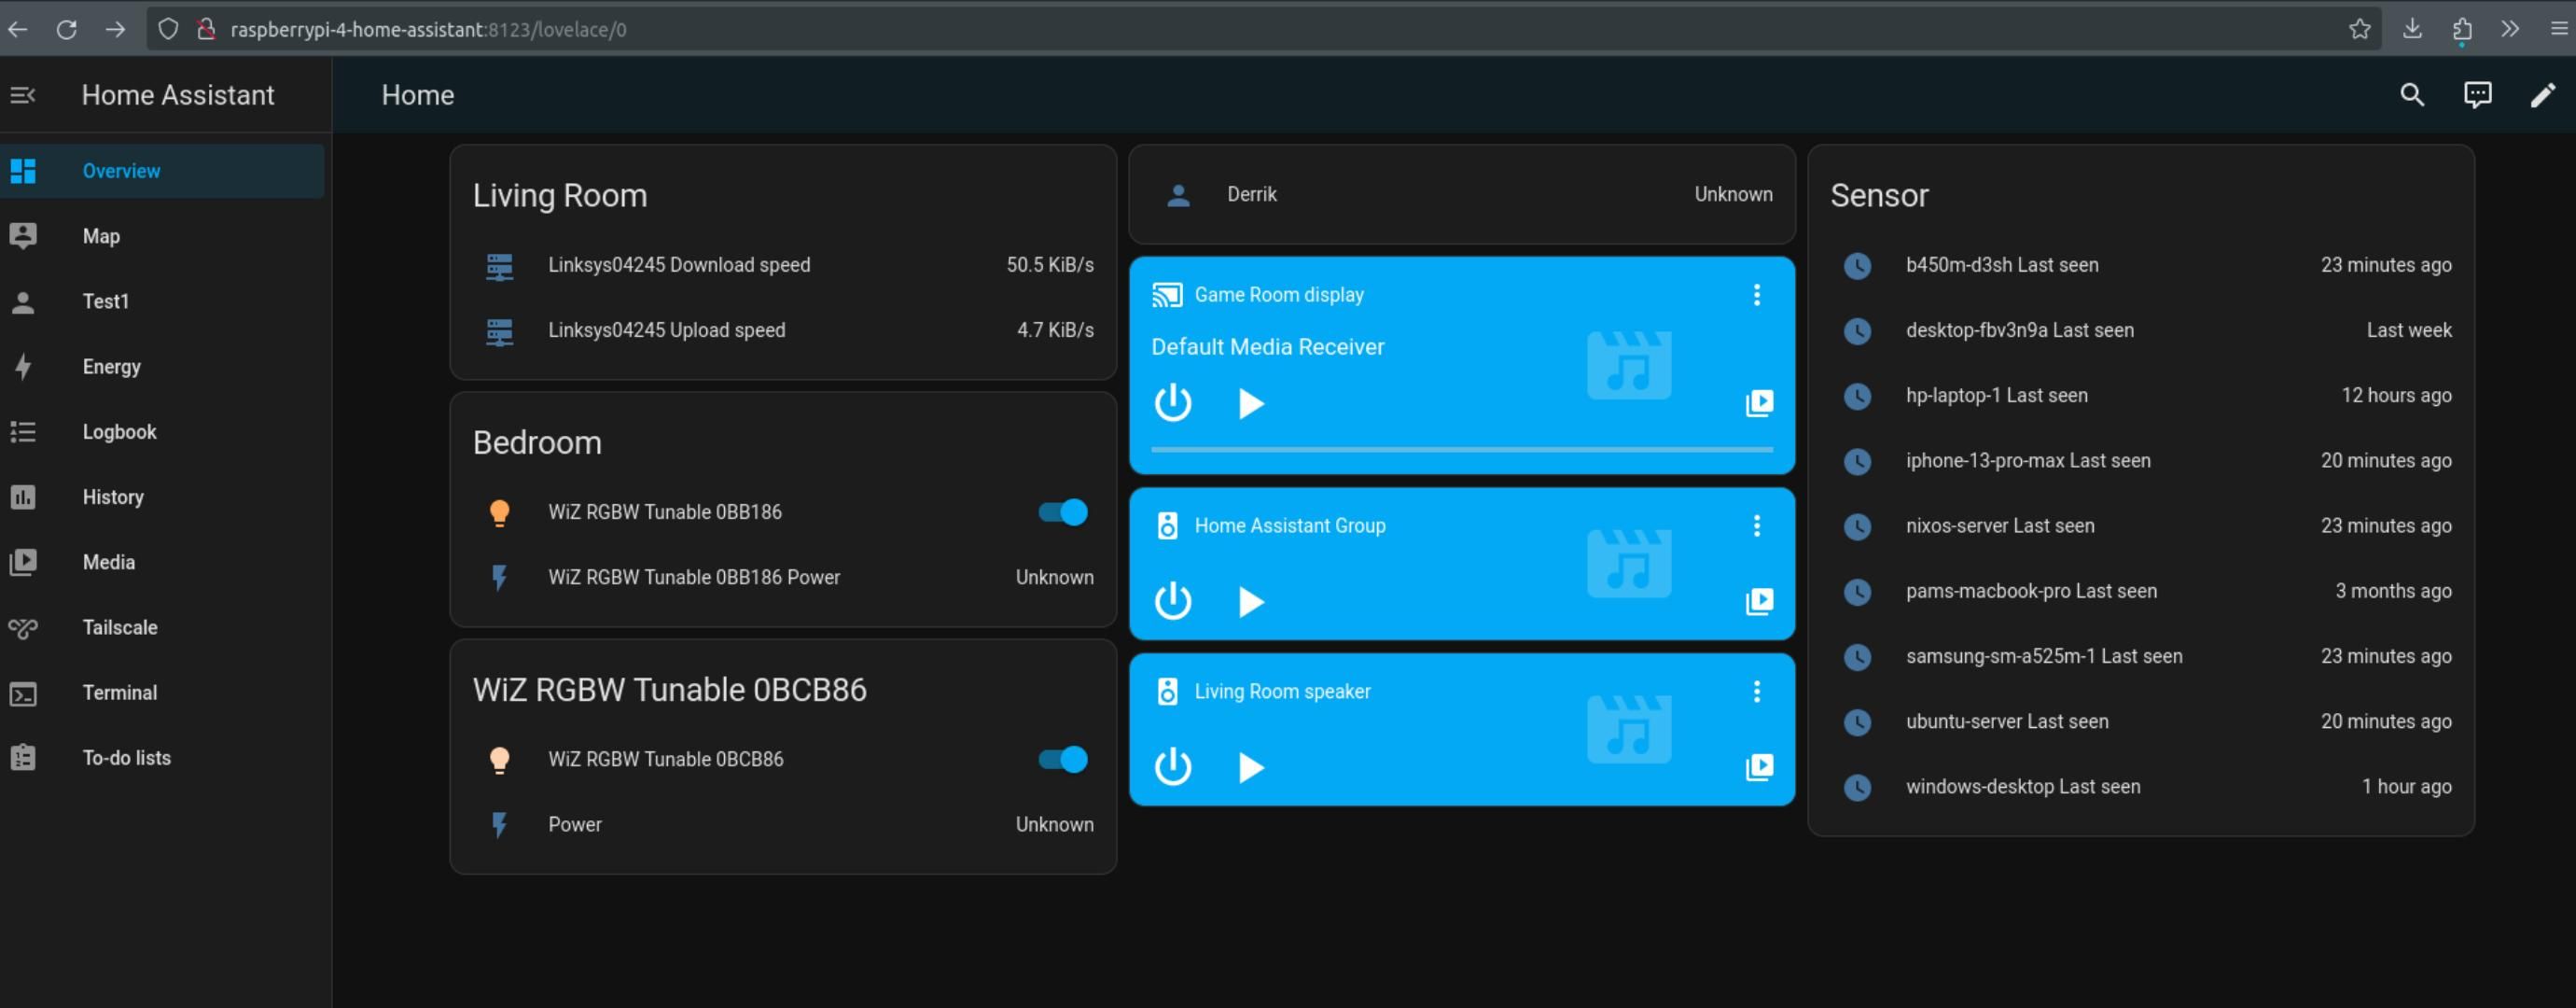
Automating your smart home is straightforward with Home Assistant directly from the dashboard. For instance, you can add cards that allow you to control lights automatically, monitor weather conditions, and set up corresponding automations. These automations can include turning off lights, adjusting the thermostat in response to weather changes, or sending alerts when a door opens.
To set up these automation rules, head to Settings > Automations & Scenes and then click on “Create Automation.” From there, choose “Create New Automation” and specify the conditions for “When” or “And if (optional)” and “Then Do” to tailor devices to your automation needs.
Keep Your Smart Home Running Smoothly
Keeping your Smart Home running smoothly with Home Assistant requires regular maintenance and monitoring. Start by ensuring that Home Assistant and all connected devices are up-to-date. Updating your devices not only introduces new features and enhancements but also security patches that protect your network and data. You can update Home Assistant under Supervisor > Dashboard.
Regular updates can prevent many common issues that arise from vulnerabilities and software bugs. Additionally, it is a good idea to keep a log of all changes made to your system settings or device configurations. Maintaining a log is invaluable as it assists in troubleshooting issues or restoring your settings after an update.
A stable network connection is essential for ensuring your Smart Home runs smoothly. A weak or spotty internet connection can disrupt communication between your Home Assistant and connected devices, leading to problems. Consider investing in a stronger router if you are experiencing issues, or place your Home Assistant Pi directly next to the router for optimal network connectivity. Additionally, keep an eye on devices that are battery-powered and replace their batteries as needed.
Lastly, security and backups are crucial. Be sure to use strong, unique passwords for Home Assistant and all your devices. You should also consider enabling two-factor authentication to add an extra layer of security. Regularly back up your Home Assistant configuration to an external USB drive, Google Drive, or another storage medium. This way, if your Home Assistant ever encounters issues, you can easily restore it without any hassle.
If you’re thinking about creating a smart home, take a look at our favorite smart home devices or just focus on the essential smart home devices to keep things simple . If taking on a whole home project sounds like a lot of work, try starting your smart home journey with a single room instead.
Also read:
- [New] In 2024, Maximizing Your Video's Impact with Expertly Recorded Voices
- [New] Mastering PS4 Screens with OBS Full Steps for 2024
- [Updated] The Future Unfolds Analyzing The Shift From M1 Pro To M1 Max
- 2024 Approved Celebrating the Best Ten Music Video Lives
- 2024 Approved Easy Steps to Document Video Calls
- 2024 Approved Elevate Expression with Audio in Statuses
- 2024 Approved Maximizing Potential in Google Photos Features
- A Comprehensive Walkthrough for Windows 11 Webcam Driver Updates
- Epson Perfection V500 Software Download - Free Drivers
- Get the Newest AMD Radeon Pro W5700 Drivers Now – Compatible with Windows 11/10/7
- Get the Updated Epson Stylus NX420 Drivers: Compatible with Windows 7, 8 & 10
- How to Obtain Newest ASUS Laptop Drivers Online
- In 2024, Perfect Your YouTube Experience Add Timestamps Efficiently
- Install Newest Epson L3150 Driver Software on Windows Operating Systems - 10, 8, & 7
- Installing Windows Drivers: HP Officejet Pro 8600 Download Guide
- Secrets to Effective Video Tagging Revealed Here!
- The Ultimate Source for Computer Components - Tom's Hardware
- The Ultimate Strategy for Superior Videos with VCE 2.2
- Troubleshooting and Fixing HP's Beats Sound Drivers in Windows 10/8/7 - Solved!
- Title: Control Your Eco-Friendly Smart House with Raspberry Pi - A Step by Step Guide
- Author: Joseph
- Created at : 2024-10-17 17:49:51
- Updated at : 2024-10-19 06:36:24
- Link: https://hardware-help.techidaily.com/control-your-eco-friendly-smart-house-with-raspberry-pi-a-step-by-step-guide/
- License: This work is licensed under CC BY-NC-SA 4.0.